Wondering how to create a contact form in WordPress? Let us answer your query with this article.
A contact form is a simple tool of communication. It helps you to get in touch with prospective clients, keep spam at bay, and grow conversions.
Thus, if you own a WordPress website, it’s a good idea to add a custom contact form to it. But how to do that?
Well, we’ve prepared an easy tutorial below that shows you the step-by-step process of building a contact form in WordPress.
So, let’s start!
Why Do You Need a Contact Form For Your WordPress Site?
Since you’re here, we assume you’ve decided to add a contact form to your WordPress site.
And it’s possible that some of you are wondering why you need to use a contact form in the first place.
Well, here are a few reasons having a contact form on your site is beneficial.
- You can eliminate any barriers of communication by letting your visitors directly contact you through a form on your site.
- You can manage queries received through contact forms and address them efficiently.
- Since communication is much easier, visitors enjoy a great user experience on your site.
- With a contact form available, you don’t need to publicize your company email address. Hence, this prevents annoying spam emails.
- You can collect contacts for your email lists and boost your email marketing efforts without hassle.
- Contact forms help you identify prospective clients and engage them accordingly. This, in turn, helps you increase your leads and conversions.
That’s why it’s a fantastic business strategy to include contact forms in your WordPress website.
But how do you add one without having to rely on a developer? Read ahead to find out!
Best Way to Add a Custom Contact Form in WordPress
Since WordPress doesn’t let you add a contact form by default, you must take the help of a third-party plugin.
There are plenty of form builder plugins in WordPress that help you build custom contact forms without coding.
And the best among these plugins is Everest Forms, a popular contact form builder.

This beginner-friendly tool is the easiest way to create and customize various WordPress forms. Contact forms, leave request forms, hotel reservation forms, you name it!
Besides, you get 40+ custom form fields that you can use to create simple to advanced contact forms. Plus, there are several customization options available for each of these fields.
Since the builder interface is so user-friendly, you’ll have a complete contact form within a few minutes.
And Everest Forms is available for free! So, you can build unlimited contact forms without paying a penny.
But the plugin does have a premium version. So, you can upgrade if you need more advanced features for your WordPress forms.

That’s why we recommend Everest Forms as the best way to create a contact form in WordPress.
How to Create Contact Form in WordPress?
Below, we’ve used Everest Forms to demonstrate the step-by-step process of creating a contact form in WordPress.
So, let’s start without further delay.
Step 1: Install and Activate the Everest Forms Plugin
First of all, you must install and activate the Everest Forms plugin on your website dashboard.
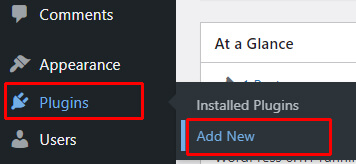
To do that, log into your site’s admin dashboard. Here, go to Plugins >> Add New.
Then, search for the Everest Forms plugin. Once it appears on the search results, press Install Now and then Activate it.
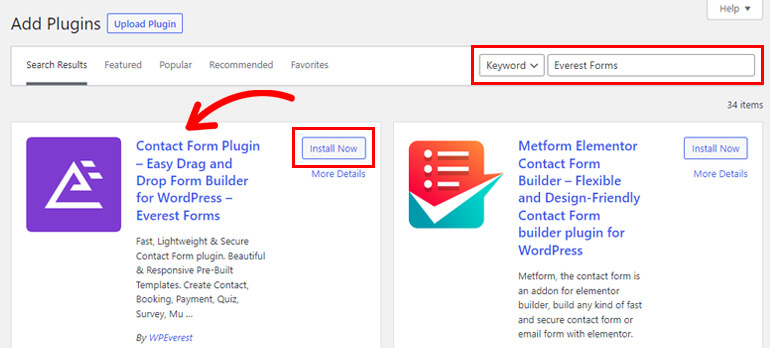
This will add the free version of Everest Forms to your website.
Step 2: Create a New Contact Form
With the free version installed, you can create any form you might need for your site. This includes WordPress contact forms.
Now, there are two ways to build a contact form with Everest Forms. You can either use one of the pre-built templates provided by the plugin. Otherwise, you must build the contact form from scratch.
We’ll go through both methods below to help you create a contact form easily.
Build a Contact Form in 1 Click with the Pre-built Template
The first method of building a contact form with Everest Forms is using one of its pre-built templates.
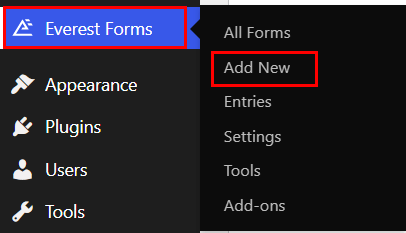
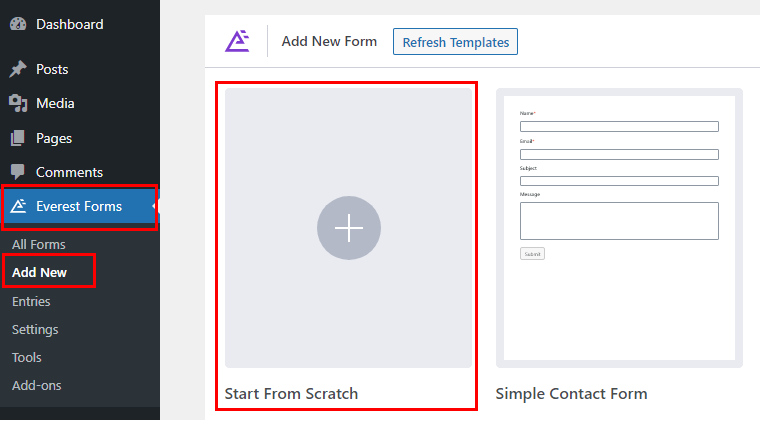
You’ll find these templates under Everest Forms >> Add New. There are beautiful templates available for contact forms, reservation forms, application forms, and so on.
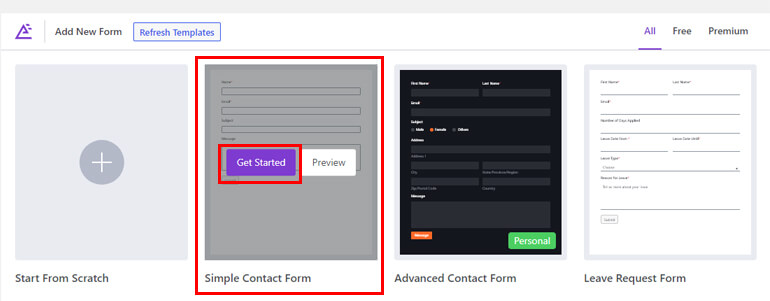
Since we’re building a contact form, choose the Simple Contact Form template by clicking the Get Started button.
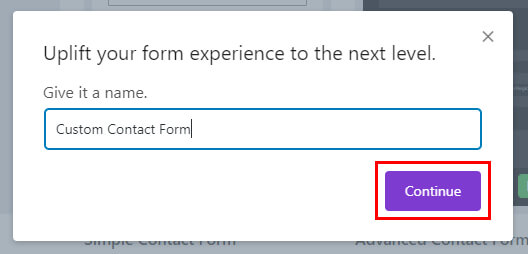
Now, a popup asks you to name the form. Thus, give the form a suitable name and click Continue.
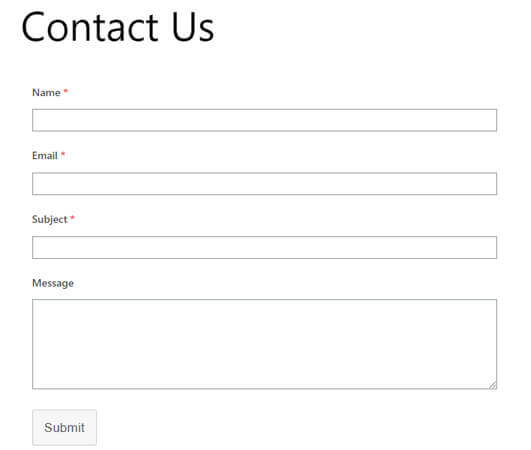
As you can see, the template already has all the basic fields you’d need for a simple contact form.
- Name
- Subject
- Message
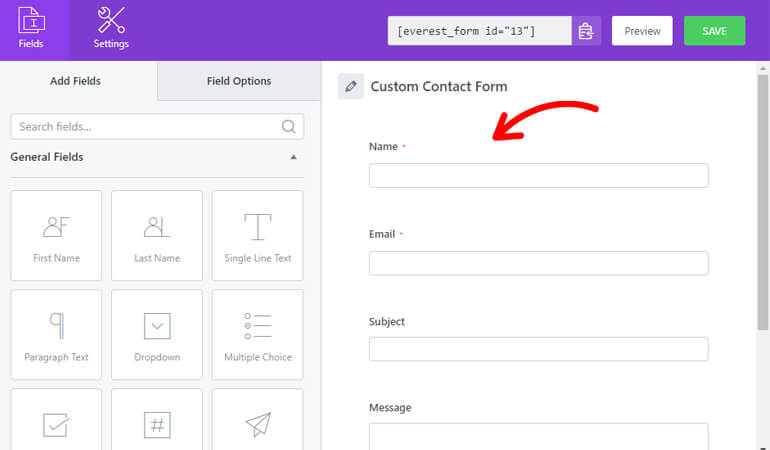
You just need to customize the fields, which we’ll discuss in the next section.
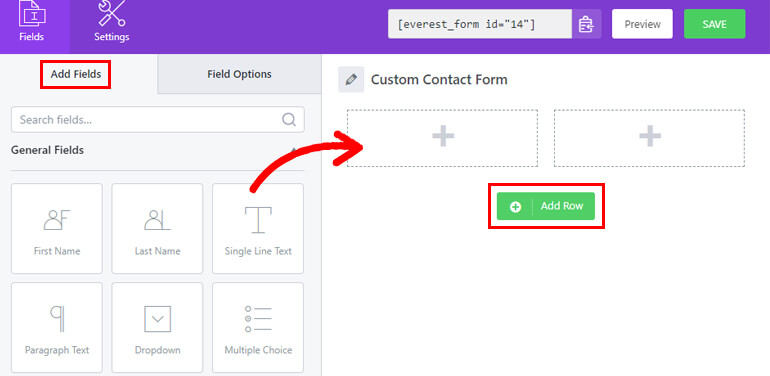
If you need to add more fields, just drag and drop them from the Add Fields tab on the left.
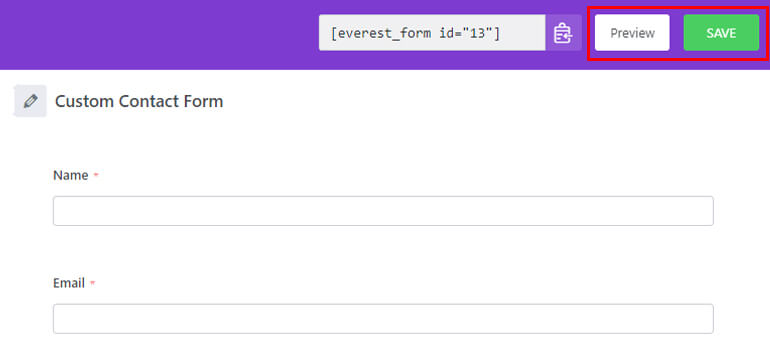
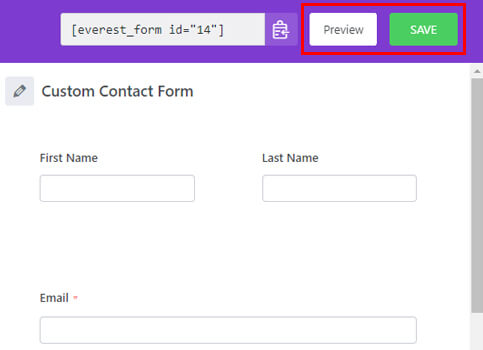
Press the Save button at the end. Likewise, press the Preview button to check how the form looks from the front end.
Build a Contact Form from Scratch
If you don’t want to use a template, you can create a contact form from scratch as well.
In the Everest Forms >> Add New page, select Start From Scratch instead of any template.
Give the form a suitable name and press Continue.
Now, you’ll end up in the same form builder interface as the method above. However, the form is empty.
So, you must add the required fields from the Add Fields tab to the form. All you have to do is drag and drop the fields into appropriate rows. And to add a new row to the form, click the Add Row button.
Since we’re creating a contact form, use fields such as Email, Paragraph Text, Single Line Text, First Name, Last Name, etc.
If you want to rearrange the order of the fields, simply drag them up or down.
You can also change the layout of the form to multiple columns. Hover over the row in the form and click the Edit icon. Then, choose the number of columns you want.
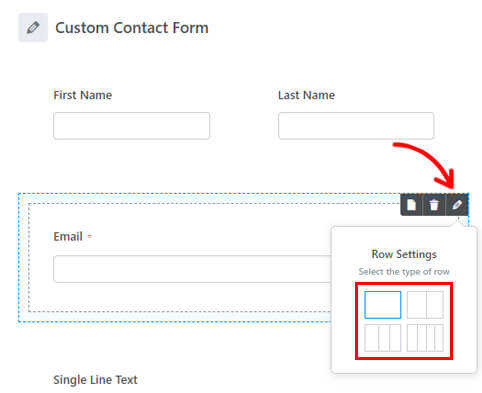
Moreover, you can duplicate or delete the rows as well.
Finally, hit the Save button at the top when the form is complete. You can also Preview the form to check how it looks in the front end.
Step 3: Customize Your Custom Contact Form
When the form creation is complete, it’s time for customization.
The good news is that you can customize individual form fields on the form with Everest Forms.
Click on the field you want to edit, and its customization options will appear in the Field Options tab on the left.

You can do this for each field you’ve added to the form.
Now, there are some options that are the same for each field such as:
- Label: Here, edit the label of the field you want to display in the front end.
- Meta Key: It’s a unique value assigned to the field to be stored in the database. We usually don’t recommend editing this option unless you’re planning on custom development.
- Description: Give a short description of the field to let users know what information they’re supposed to enter in the field.
- Required: Tick the checkbox to make the field required. Users can’t submit the form if they leave the required fields empty.
In the Advanced Options, you can further customize the following options:
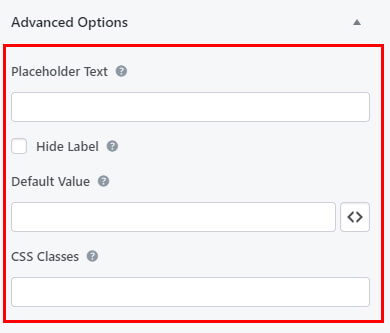
- Placeholder Text: You can add placeholder text that’s displayed in the field area.
- Hide Label: If you don’t want the field label to be visible, tick this checkbox.
- Default Value: Using this option, you can provide a default value for the field.
- CSS Classes: Give your custom CSS classes to customize the field further.
Thus, you can edit these options for most of the fields. But depending on the field, the plugin adds several unique options for customization.
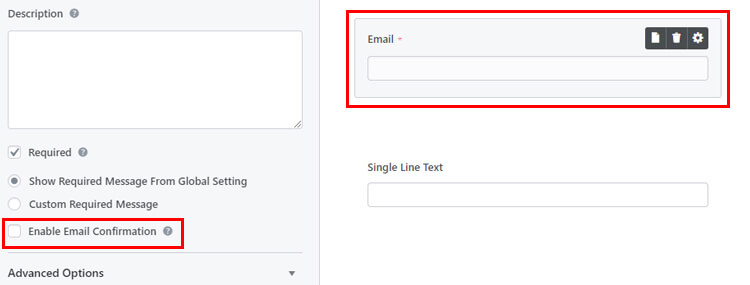
For example, the Email field lets you Enable Email Confirmation. This feature isn’t available for other fields.
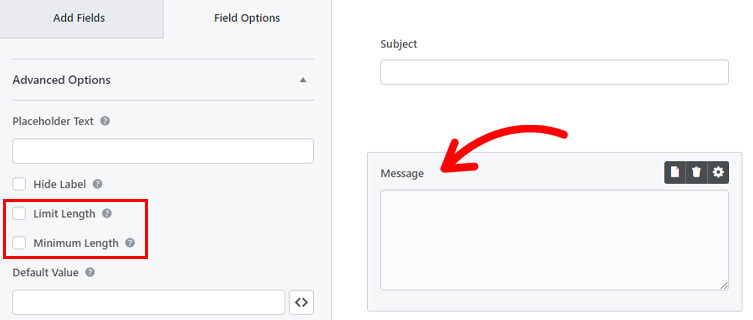
On the other hand, you can limit text length and provide maximum length for the Paragraph Text field.
Hence, you must edit each field as required with the available options.
When you’re done, click the Save button at the top to save all the customization.
Step 4: Configure the WordPress Contact Form Settings
Before you publish the contact form, you must configure a few form settings.
You’ll find these settings in the Settings tab of the form builder at the top. When you click on the tab, you’ll find two categories: General and Email.
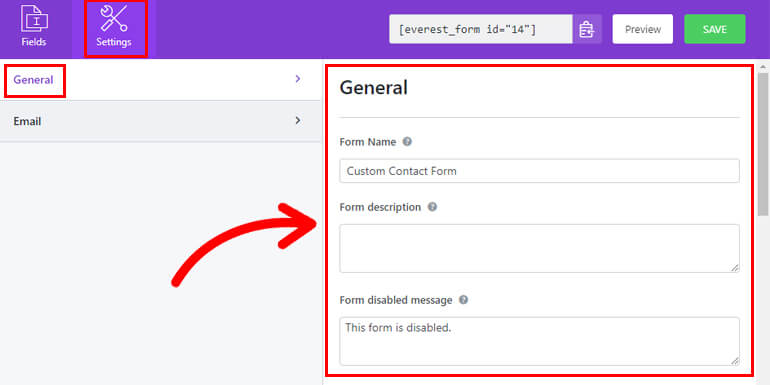
General: From this section, you can change the Form Name, Form Description, Submit Button Text, Form Disabled Message, and more.
The plugin also lets you choose a layout design for the contact form between Default and Classic. Likewise, you can enable custom redirection after submission, AJAX form submission, and more.
You can also add custom CSS classes for the form if necessary.
Email: The Email section allows you to create and customize as many admin and user emails as you need. Just press the Add New Email to create a new email notification.
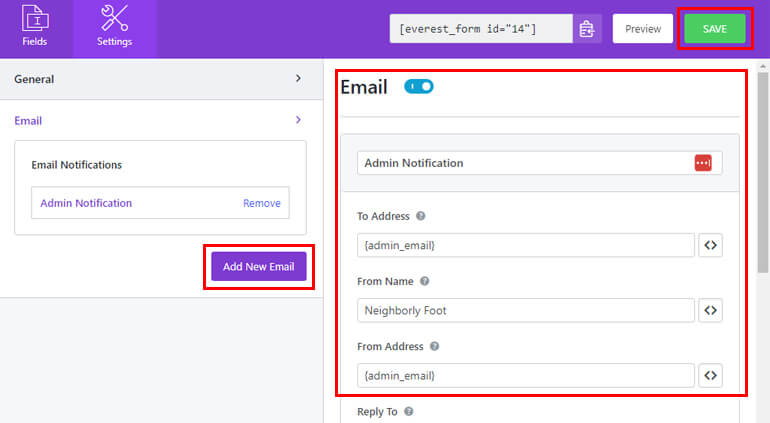
Click on the email you want to edit and set the From Address, To Address, From Name, and other parameters for it.
After the configuration is complete, hit the Save button at the top. Your form is now ready for publishing.
Step 5: Display the Contact Form on Your Website
Finally, it’s time to display the contact form on your WordPress website.
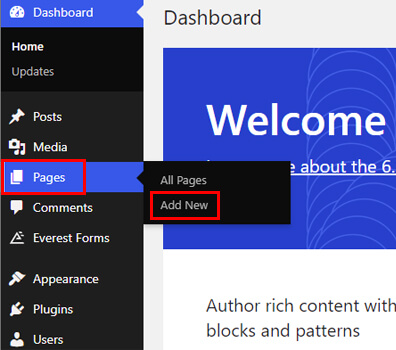
So, open the page or post where you want to add the contact form.
You can also create a completely new page or post from Pages/Posts >> Add New.
This takes you to the Gutenberg editor. Here, start by giving the page a title like “Contact Us.”
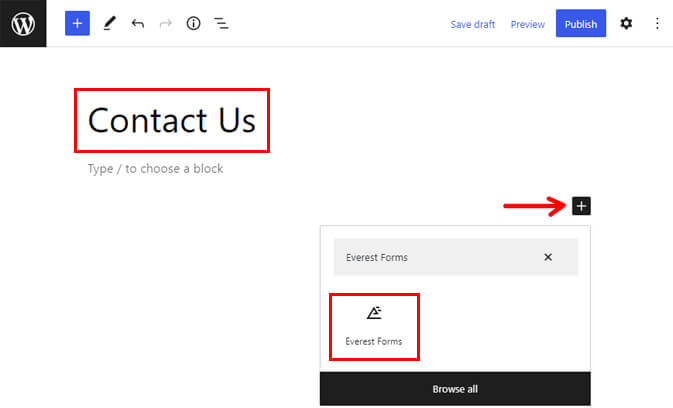
Then, press the block inserter ‘+’ icon and add the Everest Forms block to the page.
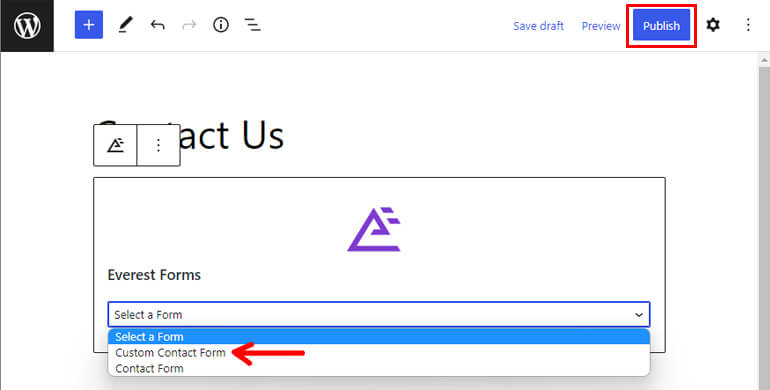
Select the contact form we created above from the dropdown and Publish the page.
Alternatively, you can use the form shortcode to add the form to the page. All you have to do is add a Shortcode block to the page instead of the Everest Forms block.
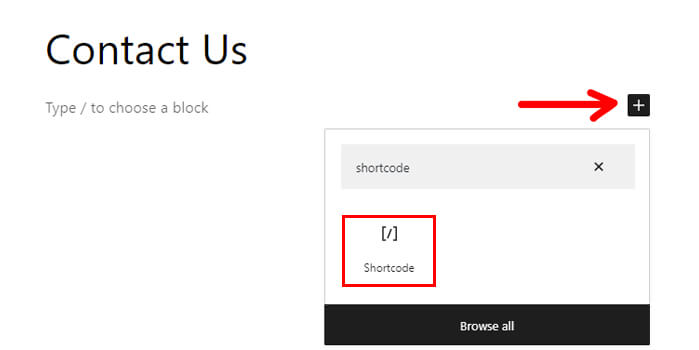
Copy the form shortcode from the top of the form builder and go back to the editor.
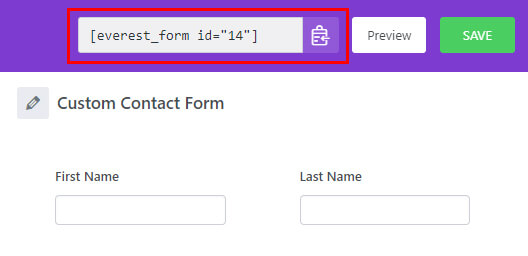
Paste the shortcode into the block and hit Publish.
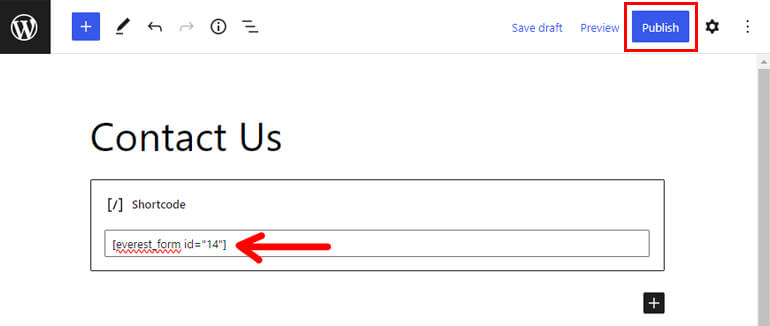
Your WordPress contact form is now live on your site!
Step 6: Add the Contact Us Page to Your Website’s Menu
Although the form is live, it doesn’t guarantee that your visitors will be able to find the Contact Us page.
To make the form accessible to all users, you must add the Contact Us page to the site menu.
Since the link to the page is visible on the main menu, users can easily find and submit the contact forms.
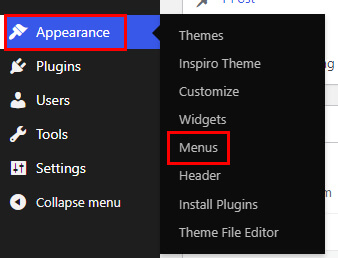
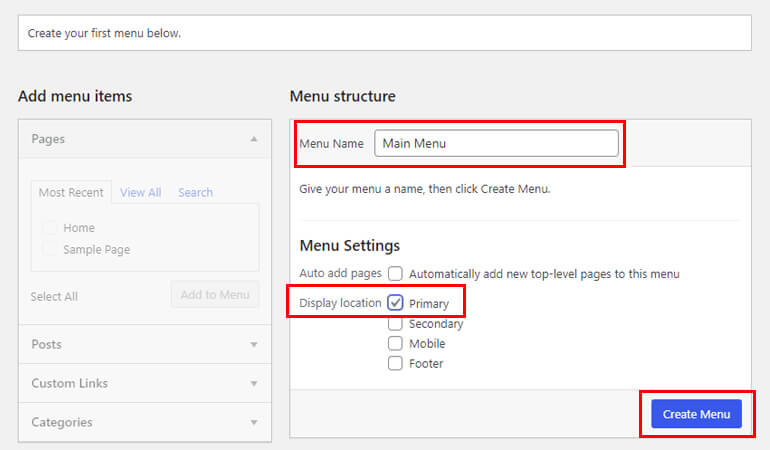
Start by opening Appearance >> Menus on your dashboard.
Let’s create a new menu first. Give the menu a name and tick the Primary Menu checkbox for Display Location. Then, click Create Menu.
If you already have a menu, go to its Edit Menus tab. Here, you’ll see a section titled Add menu items.
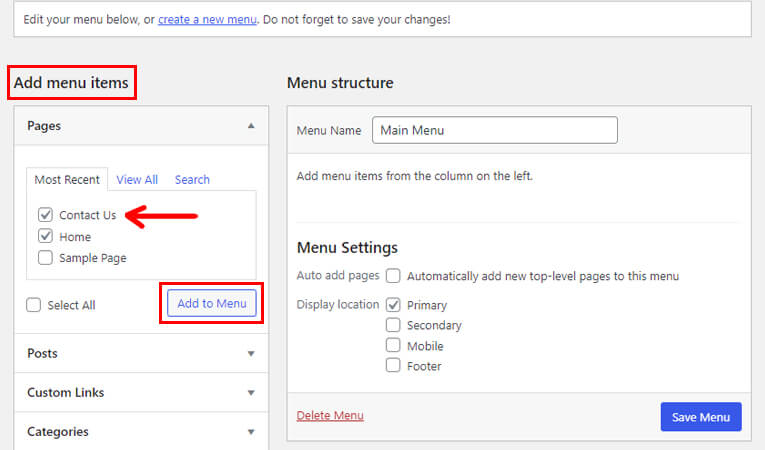
In the Pages option, select the Contact Us page, and press Add to Menu.
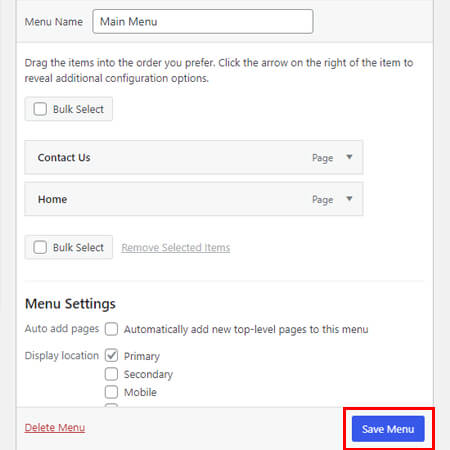
Finally, click the Save Menu button. The navigation menu on your website now displays the Contact Us menu that’s clearly visible to visitors.
Note: This method is only applicable to Classic themes. For FSE themes, you’ll have to use the theme’s Editor to add the page to the navigation menu.
Upgrade Your WordPress Contact Form with Everest Forms Pro
So far, we’ve used only the free version of Everest Forms to help you create a simple contact form.
But what if you need to take your contact forms a step further?
That’s where Everest Forms Pro comes in. Using the vast collection of add-ons it offers, you can avoid the limitations of the free version.
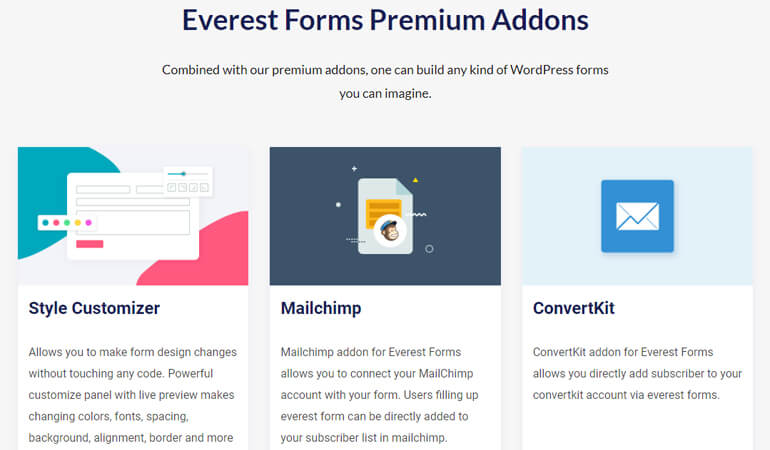
You can add Google Maps to the contact form, use autocomplete address fields, utilize Select2 fields, and more.
Moreover, the pro version lets you prevent spam form submissions with the help of various CAPTCHAs.
Besides that, you can:
- Upload files submitted through the form directly to Google Drive or Dropbox.
- Enable conditional redirection after form submission.
- Customize email templates without coding.
- Convert form submissions to PDF files.
And that’s just the tip of the iceberg.
Thus, we recommend Everest Forms Pro if you want to level up your WordPress contact forms. You can check out all the pricing plans on the official pricing page and make an informed purchase.
Wrapping Up!
If you want to create a contact form in WordPress, you must have the right plugin at hand. This makes the process simpler and quicker for you.
And the best plugin we can recommend is Everest Forms. With its drag-and-drop builder, even beginners can create simple or advanced contact forms within minutes.
Use one of the pre-designed templates the plugin offers, or create everything from scratch.
You can also add more features to the contact form by upgrading to Everest Forms Pro. For instance, you can schedule form submission date and time, integrate the form with third-party apps, etc.
Read more about this plugin on our official blog. You can also subscribe to our YouTube channel for video tutorials on the plugin’s different features.
Share this article on your social media if you found it helpful. Also, follow us on Twitter and Facebook for instant updates on new blog posts.


![Zakra 3.0 | Zakra Pro 2.0 Release [Major Updates!]](https://i.ytimg.com/vi/g3rifl7kWvg/maxresdefault.jpg)