
Looking for a way to create a beautiful and professional leave request form in WordPress? Then, this article is exactly what you need.
A leave request form in WordPress helps you keep the track of leave applications by your employees, students, etc. Further, it allows you to easily obtain absence details like reason of absence, date, and duration of absence, and more. Thus, it streamlines the process of managing leaves for your users.
In this post, we’ll walk you through a simple way of creating a leave request form in WordPress. So, keep reading!
Why Create a Leave Request Form in WordPress?
Having a leave request form submitted on paper or via email is an outdated process. Moreover, it’s challenging to manage and process the leave request efficiently in that way. Hence, a smart solution to the problem is to create a leave request form in WordPress.
Adding a leave request form in WordPress simplifies the process of requesting leaves for your users. They’ll be able to submit essential information like types of leave (sick leave, maternity leave), leave duration, leave date, etc., without any hassle.
Also, you’ll be able to collect all your users’ leave request details right from your WordPress dashboard. You can view them immediately and approve or deny them, depending upon the circumstances. Thus, leave management becomes easy and efficient.
Having said that, let’s get to know how to create a leave request form in WordPress without further ado.
How to Create a Leave Request Form in WordPress?
Creating a leave request form in WordPress is quite simple. You just need to follow the step-by-step instructions as we’ve mentioned below:
Step 1. Choose the Best Leave Request Form Plugin for WordPress
Before creating a leave request form in WordPress, you need to choose a great form plugin for your site. There’re a plethora of options for the form builder plugin that let you create a leave request form. However, the best amongst all is Everest Forms.
Everest Forms is the popular drag and drop form builder plugin for WordPress. The plugin is perfect both for beginners as well as advanced users.
Using this plugin, you can create simple to complex contact forms, call-back forms, job application forms, and more without any coding skills. Hence, it also allows you to build employee leave request forms, student leave request forms, and so on smoothly.
Furthermore, beautifully designed pre-built templates take away the pain and extra efforts of building a form from the ground. Besides, it offers you amazing features like easy form field settings, form entry management, spam-form prevention, email notifications, and more.
Having said that, let’s talk about how to install the Everest Forms plugin next.
Step 2. Install and Activate Everest Forms Plugin
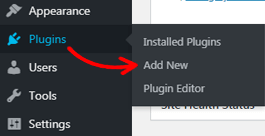
To install the Everest Forms plugin, log in to your WordPress dashboard at first. Then, go to Plugins >> Add New.
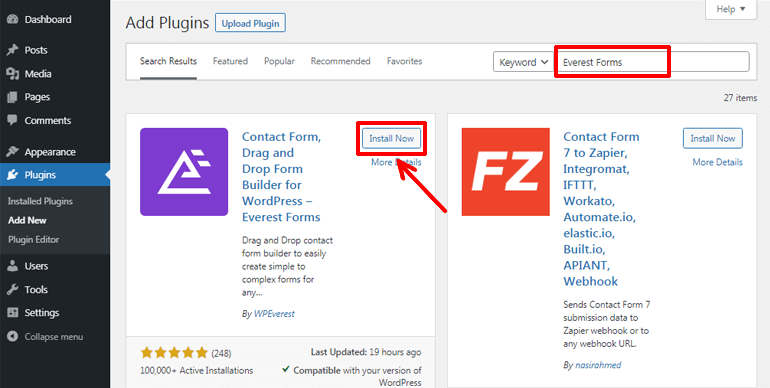
On the Add Plugins page, you’ll see the search bar. Type in Everest Forms in the bar, and the plugin will be displayed right on your screen in a moment. After that, hit on the Install Now button.
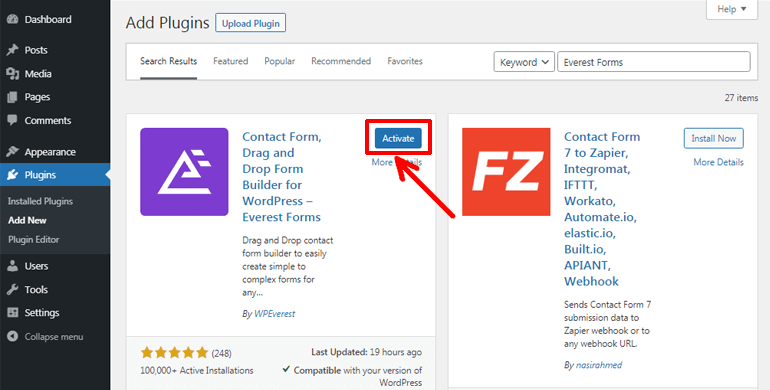
Once installed, click on the Activate button to activate the plugin.
That’s all! You’ve successfully installed and activated Everest Forms on your WordPress site. Easy-peasy!
For more detailed information, you can check our tutorial on installing a WordPress plugin here.
Note: The free version of Everest Forms is more than just enough to build a comprehensive leave request form for your site. However, you can always switch to its premium version to enjoy more advanced features.
Step 3. Create a Leave Request Form
In this section, we’ll show you two different methods for creating a leave request form in WordPress, i.e., from a pre-built template and scratch. Without any delay, let’s dive into the details of both methods.
Method I. Import the ‘Leave Request Form’ Template and Customize
Everest Forms provides access to a beautiful-looking leave request form template free of cost. Thus, you can get started with this template instantly.
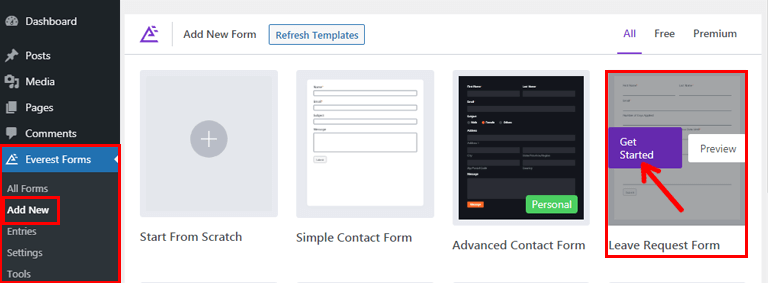
To import the form template, navigate to Everest Forms >> Add New. It’ll direct you to the Add New Form page. There you can hover over the leave request form template and click on the Get Started button.
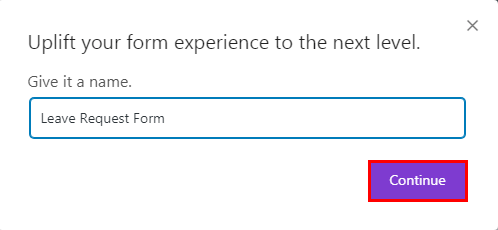
Just provide your form a proper name and hit on the Continue button.
Then, the form editor window will open up. Here, you can see that the leave request form is already created for you.
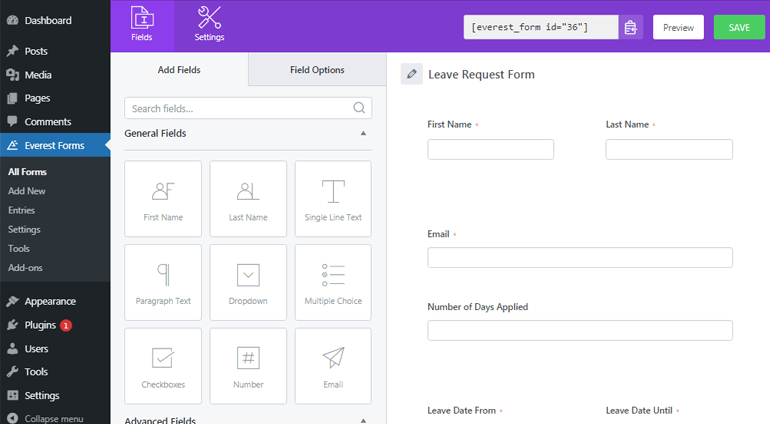
This pre-made form is suitable for college, school, university, different organizations, and so on. Thus, you can quickly add this form to your site.
Nevertheless, you also get complete freedom to customize this pre-built template according to your requirement. You can still add other form fields if you need to collect additional details from your users. Likewise, you can also rearrange and delete the form fields using a drag and drop editor effortlessly.
Method II. Create a Leave Request Form from Scratch
Instead of using a pre-built template, you can also create a leave request form from scratch. It might take you a little more extra time and effort. However, it lets you create a form specific to your needs and liking. You can add any form fields you like and customize them exactly the way you want.
To create a leave request form from scratch, go to Everest Forms >> Add New. Then, click on the Start From Scratch.
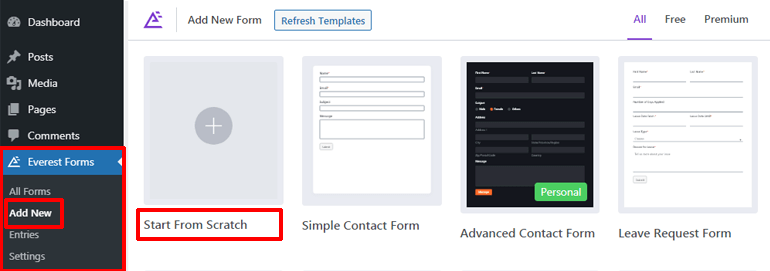
Now, you’ll be asked to name your form. Once you name your form, a form editor window opens up, and you can add the required form fields.
Add the Required Form Fields and Customize the Field Options
Everest Forms allows adding various form fields to create a comprehensive leave request form in a flash. You can drag the necessary fields from the Add Fields panel at the left and drop them to the blank space at the right.
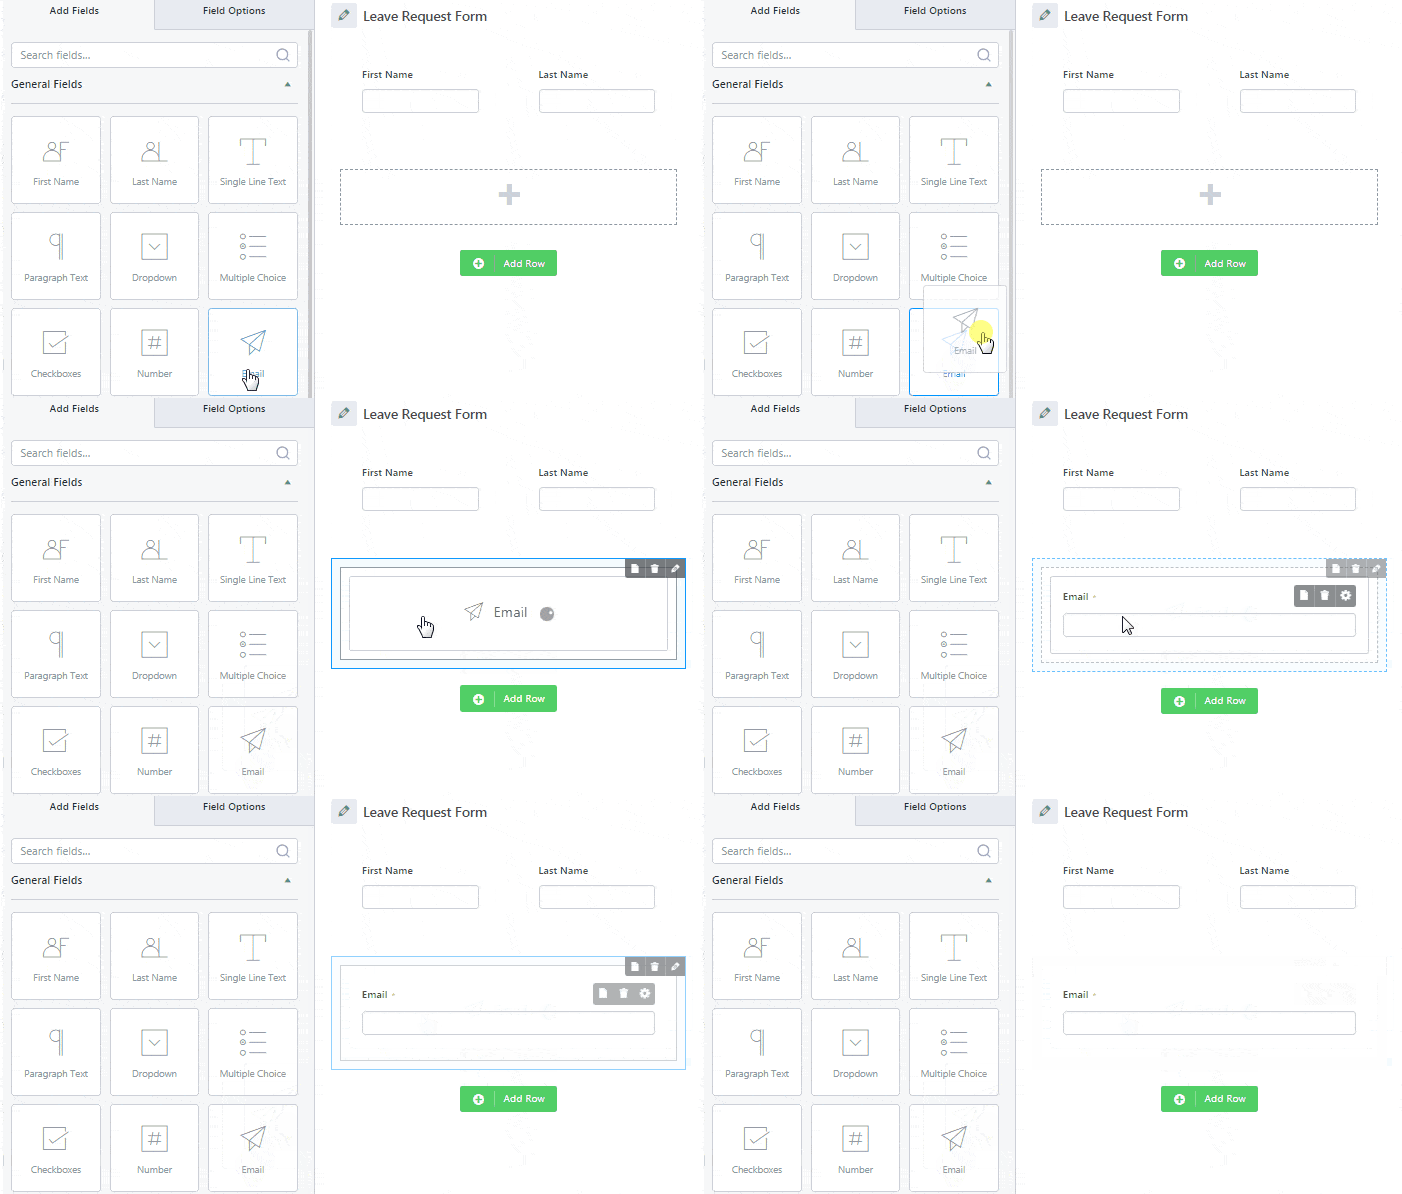
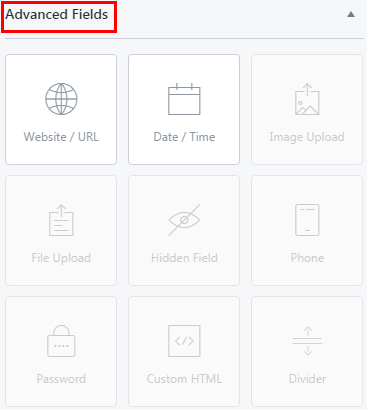
The available form fields are divided into two major headings. They are General Fields and Advanced Fields.
As you can see above, the General Fields section allows you to add fields like Name, Email, Number, etc. Likewise, you can acquire the information from your users in a line or a paragraph using Single Line Text and Paragraph Text. Additionally, you can utilize Dropdown, Multiple Choice, and Checkbox to enable users to choose from multiple options.
From the Advanced Fields section, you can also add the Date/Time field. It allows users to choose the specific date for leaves. You can also get access to other advanced fields like the Image Upload field, File Upload field, Password, etc., with the premium version of the plugin.
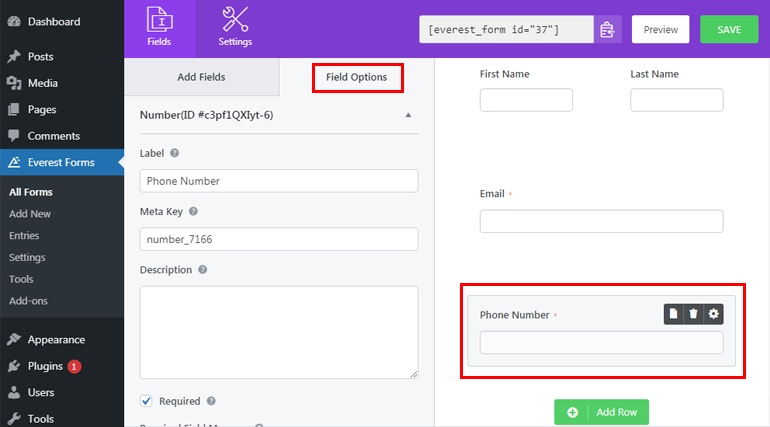
Additionally, from the Field Options tab, you can customize your form field elements in a breeze. Just click on the form field, and you’ll be able to add a proper Label and Description to the field. You can also mark the field as required to make it compulsory for your users to fill in and even add the required field message.
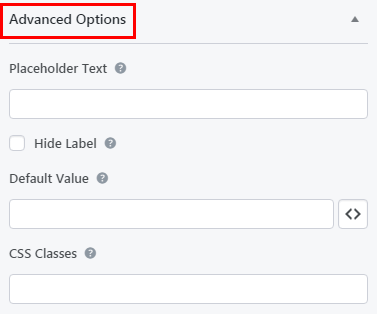
Likewise, the advanced form field options let you add Placeholder Text, CSS classes, and more.
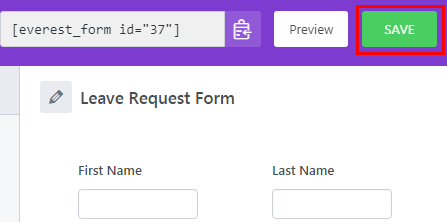
Once you’re done, make sure you hit the SAVE button at the top to save all the changes you made.
Step 4. Configure General Settings
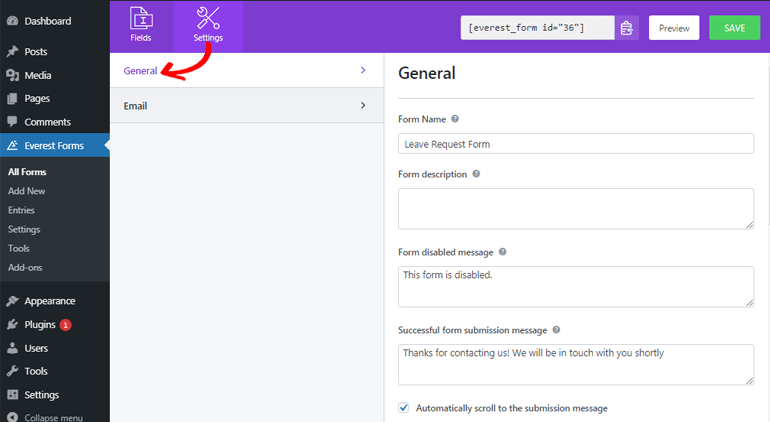
You can go to Settings >> General to configure the general setting of your form. From here, you can edit your form’s name and add a short description of the form. Likewise, form disabled or successful form submission messages can also be added easily.
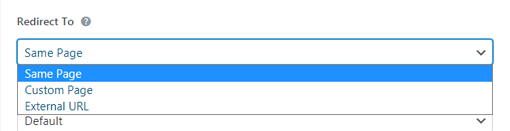
Moreover, you can redirect your users to the same page or URL of your interest with the Redirect To option.
You can also choose from various layout designs and add a CSS class as well. Further, under the Submit Button option, you can add submit button text, processing text, and a submit button class.
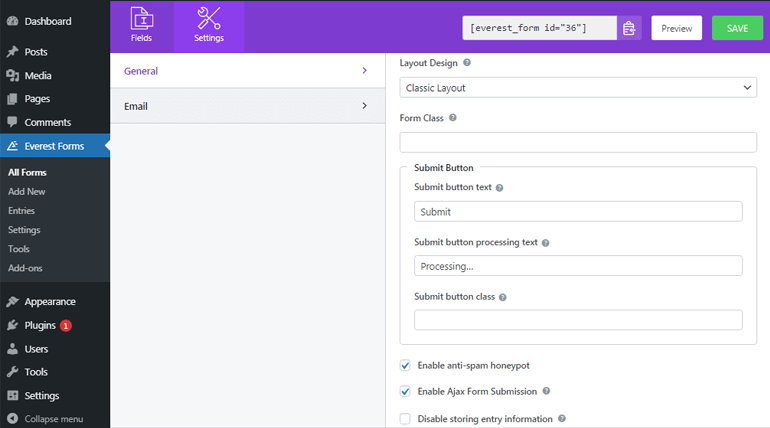
Besides, you can enable or disable anti-spam honeypot, ajax form submission, and entry information storage.
Step 5. Configure Email Notifications
Everest Forms allows you to set multiple email notifications. For instance, setting admin email notifications help you get instant alerts whenever a form is submitted. Likewise, configuring user notification email allows notifying your users that their form has been successfully received and so on.
For setting email notification, navigate to Settings >> Email. If the Email tab isn’t enabled yet, toggle on the button at first. Now, you can configure the admin email notification.
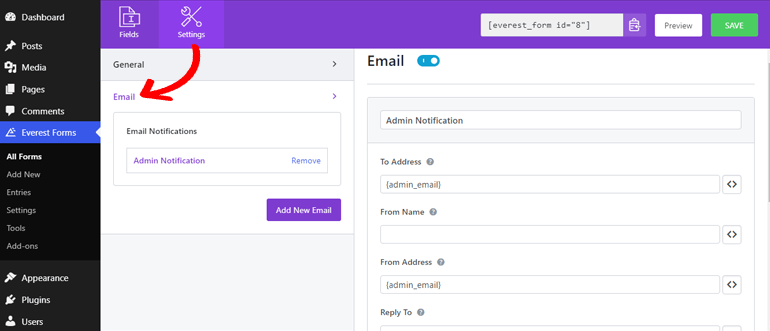
You need to enter the email address where you want the notification to be delivered in the To Address field. So, you need to enter the admin email here. If you use the smart tags {admin_email}, it’ll automatically capture the admin’s email address.
From Name displays the name of the users who submit the form. You can easily grab the name of the users by using the smart tags here as well. From Address lets you add the email address from where the form is sent. Hence for this, you should add the admin’s email address.
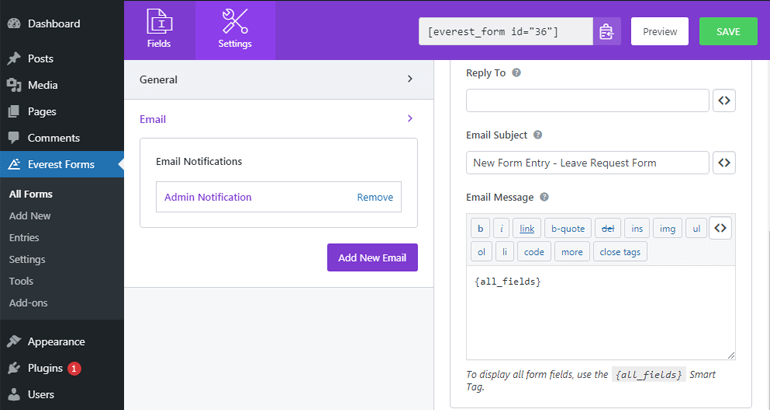
Reply To enables you to add the email address where you want to reply after you receive an email. Moreover, you can add the subject and message to the email.
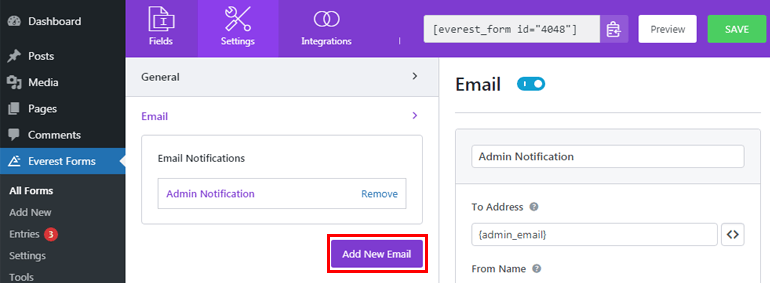
Again, to set the new email for your user, click on Add New Email. Then, give your email an appropriate name and configure the settings as before.
Step 6. Publish a Leave Request Form in Your Site
You’ve successfully created and configured the necessary settings for your leave request form. However, to see your form in action, you need to publish it on your site.
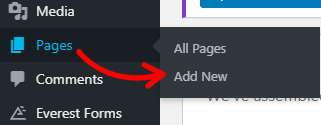
You can add your form to pages, posts, sidebar widgets, or wherever you find it suitable. Here, we’ll show you how to add it to the pages. For this, go to Pages >> Add New.
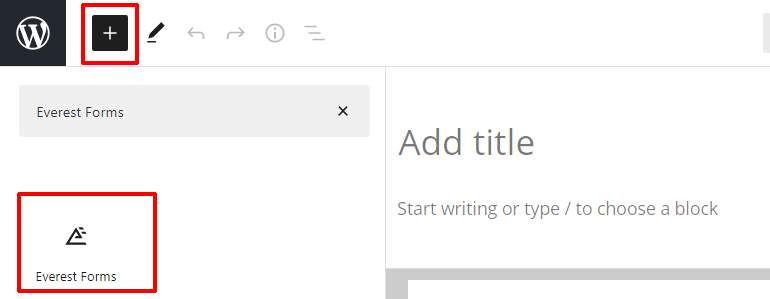
After that, click on the add block (+) button at the top, search for the Everest Forms block, and click it.
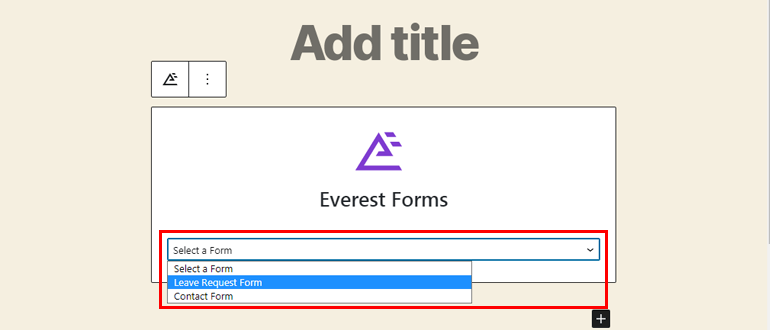
Now, from the dropdown menu, select the required form.
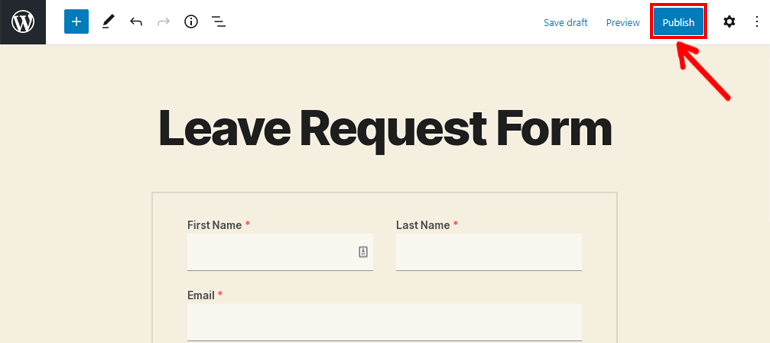
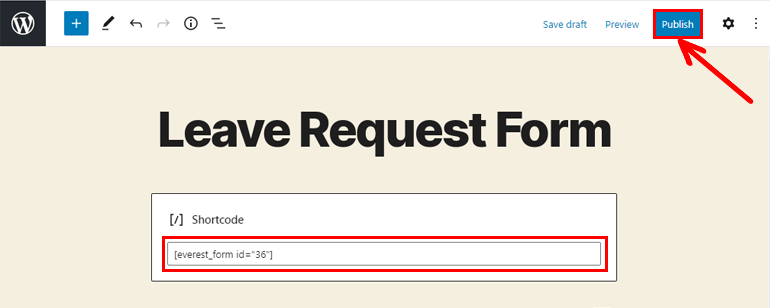
Finally, give your form a title and hit the Publish button at the top.
Alternatively, you can also use the shortcode method. For this, you need to copy the shortcode of the form at first.
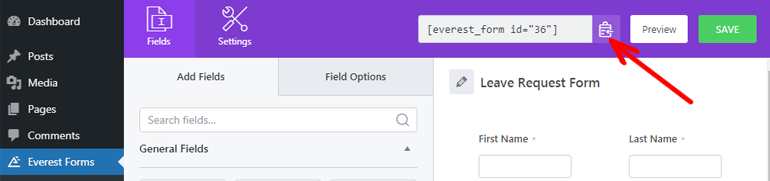
Next, go to Pages >> Add New similar as before and paste the shortcode you copied. That’s all! Your form is ready to go live once you press the Publish button.
Here’s a demo of the leave request form by Everest Forms so you can view and try it by yourself.
View the Form Entries in Everest Forms
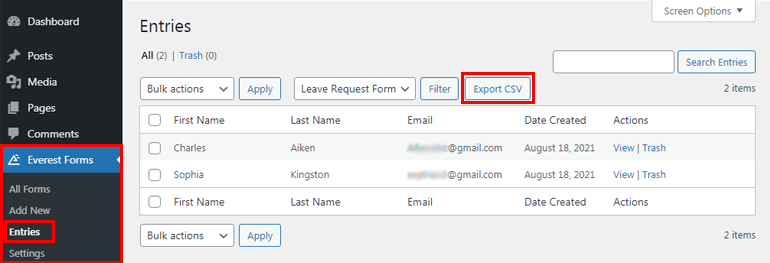
Now, you must be wondering where to view the form submitted by your users. The answer is simple as right in your WordPress dashboard.
Go to Everest Forms >> Entries to view all the form entries. Not only view, but you can also delete or export the entries as CSV if necessary.
Final Thoughts
Whether you create a leave request form from the pre-built template or scratch, Everest Forms provides a super-smooth form-building experience for sure.
So, what are you waiting for? Get the Everest Forms and create a great-looking form to manage the request for leaves efficiently. To remind you, Everest Forms is available for free!
Well, that’s a wrap-up for our article on creating a leave request form in WordPress. Hope you enjoyed what you read. If you did, please consider sharing this article on your socials as well.
Also, don’t forget to check out helpful tutorials on creating online booking forms and sign-up forms in WordPress.
Lastly, make sure to follow us on Twitter and Facebook for the latest update on articles.






![Zakra 3.0 | Zakra Pro 2.0 Release [Major Updates!]](https://i.ytimg.com/vi/g3rifl7kWvg/maxresdefault.jpg)