Looking for a tutorial on how to embed a Google form in WordPress? You found it.
Google Forms is a free web-based platform that helps you easily create different kinds of forms, especially for surveys. It’s simple and fast. And it’s also very popular since it can be used with almost every other web application.
In this article, we plan to show you how to embed a Google form in WordPress, step by step. We’ll also discuss briefly when and why you may want to embed Google form in WordPress and what other options it has.
When and Why to Embed a Google Form in WordPress?
There are many options in WordPress which provide far more features than Google Forms. For example, Everest Forms in WordPress also helps you create forms within minutes. And it has conditional logic, integration with email marketing services like MailChimp, payment options like PayPal, live customizer, and much more.
So why not use WordPress form builders instead of Google Forms?

Well, to begin with, Google Forms helps you launch your form into different websites and collect responses in a single spot. It can be easily shared and the responses are saved in Google drive. It’s also very easy to collaborate with others while managing forms and responses.
It’s true that WordPress form builders are great when you want a professional-looking form on your website that can do almost anything. But if you quickly want to create a simple and easily shareable form for surveys and similar stuff, Google Forms is still a very strong option.
How to Embed Google Form in WordPress?
Now for the tutorial, we’ll look at how to embed Google form in WordPress using the simplest and easiest method. Let’s get started.
Step-1: Creating a Google Form
To add a Google form to your WordPress website, firstly you need to create a Google form. And to create a form, head over to the Google Forms dashboard (forms.google.com). This is where you’ll start creating a Google form.
In the Google Forms window, you’ll see an option to create a form from scratch using the Plus (+) button.
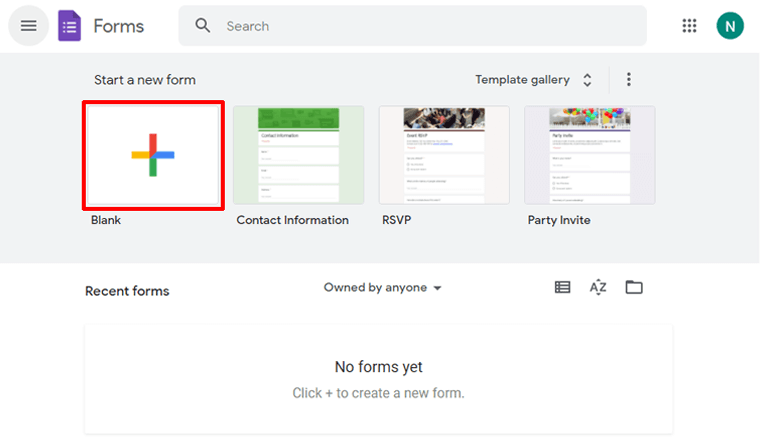
Or, you can select from over 20 templates by clicking on the Template gallery button located at the top right.
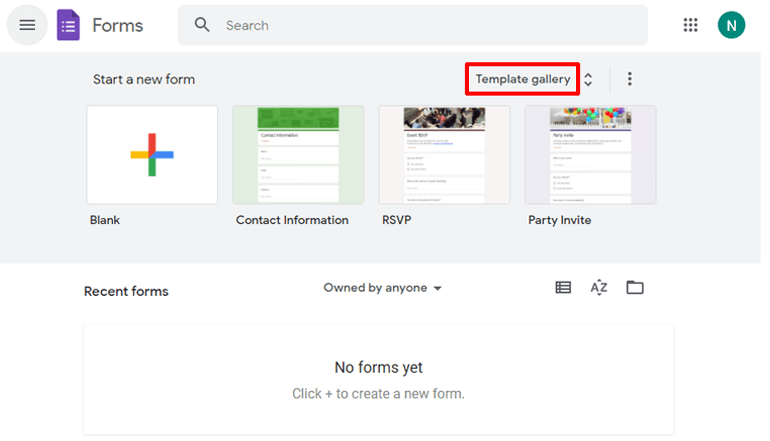
There are form templates for different purposes like surveying, event registration, feedback, etc. You can choose from any one of them to your liking.
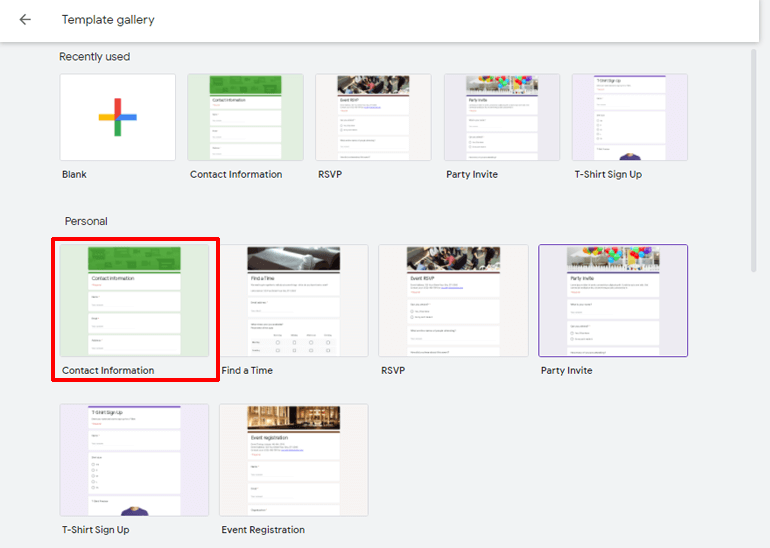
For now, let’s go with a template named Contact Information.
You can see that the required fields are already put in place. And on the right side of the fields, you can see a vertical bar of options. Using these options, you can add different types of questions, fields, import questions, and even add images and videos.
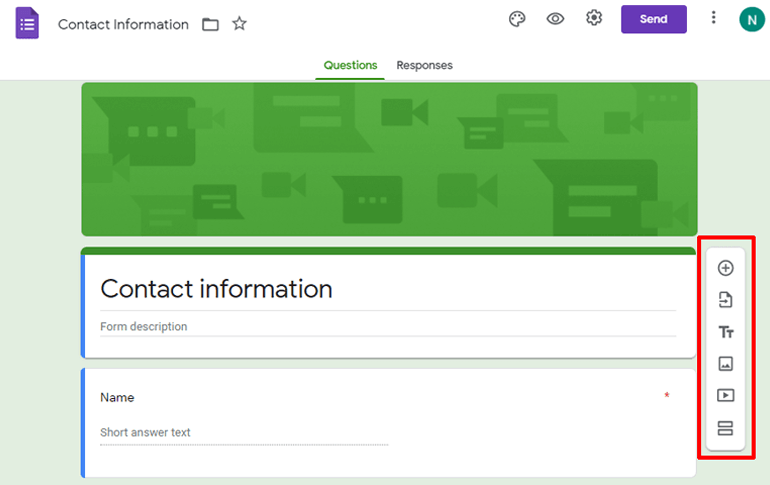
Moreover, you can also see the responses of the form right from this window using the Responses button on the top.
For more options, you can look at the right side of the top bar. The color pallet icon is for customizing the theme of your Google form. You can add a header image, change the background color, theme color, and font style from here.
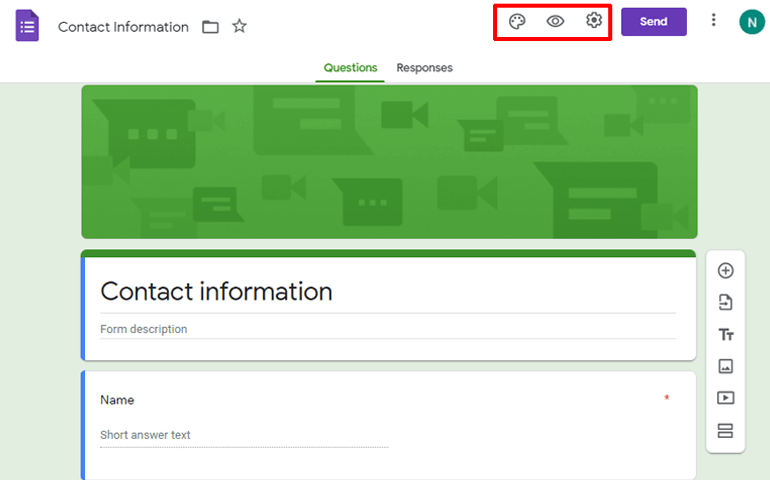
Using the eye button, you can preview how your form looks. And through the cogwheel icon, you can change the settings of your form. Using this option, you can choose to limit one response per Google account, collect emails, shuffle question orders, and more.
We have now created a Google form and quickly gone over the features and options we can try out. Now, it’s time for the next step.
Step-2: Getting the Embed Code of Our Google Form
Now, we’re going to embed our Google form into our website. So, click on the Send button on the right side of the top bar.
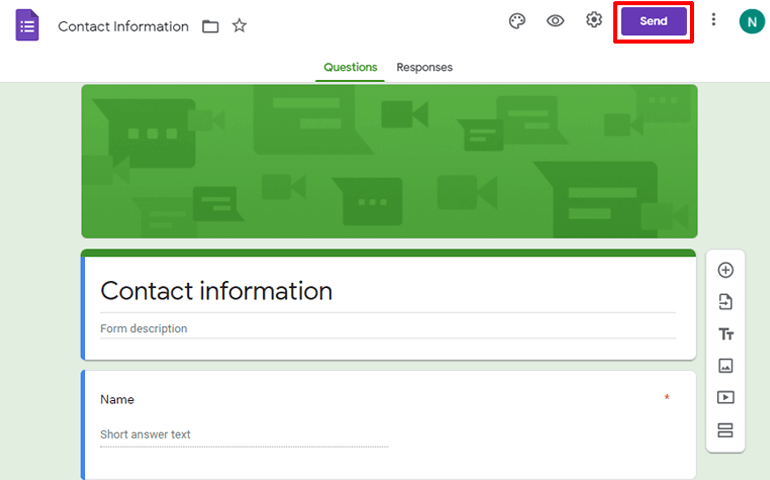
When you click on the Send button, you should see that a Google form can be sent using three different methods: using email, link, or embed code.
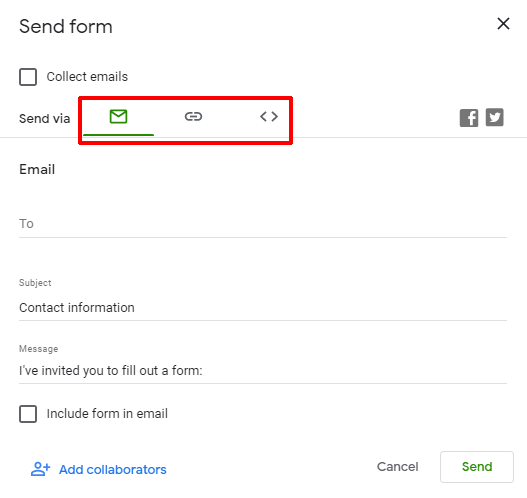
For websites, using the embed code is the best option. So click on the embed option that looks like “<>”.
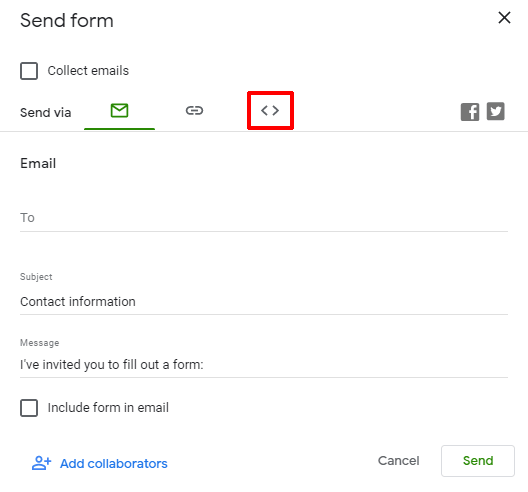
Clicking on the embed option will show you the code you need in order to embed your Google form into WordPress.
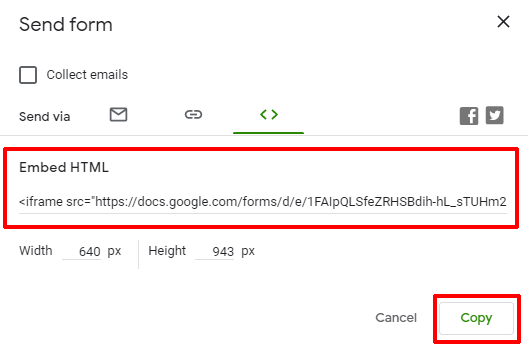
Simply copy that code using the Copy button and head onto the next step.
Step-3: Pasting the Embed Code in WordPress
Now that you have the embed code, you can have the Google forms right in your WordPress posts or pages.
To start off, log in to your WordPress dashboard.
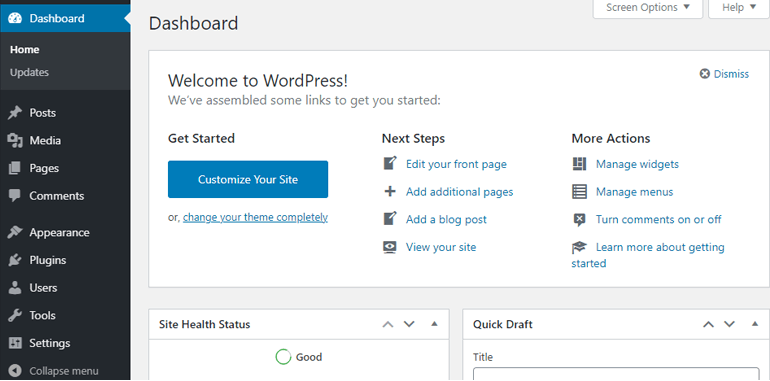
To keep things clean and clear, let’s create a new page. We will embed the Google form on this page. Simply go to Pages >> Add New.

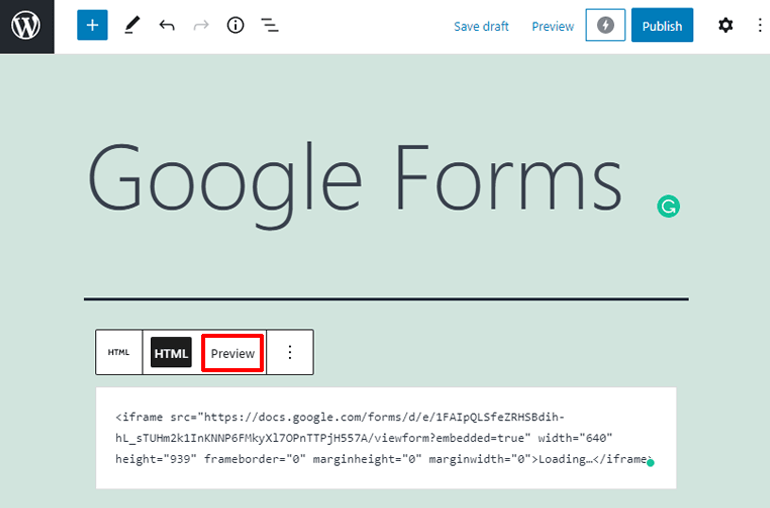
Give your page a title and add a Custom HTML block to your page.
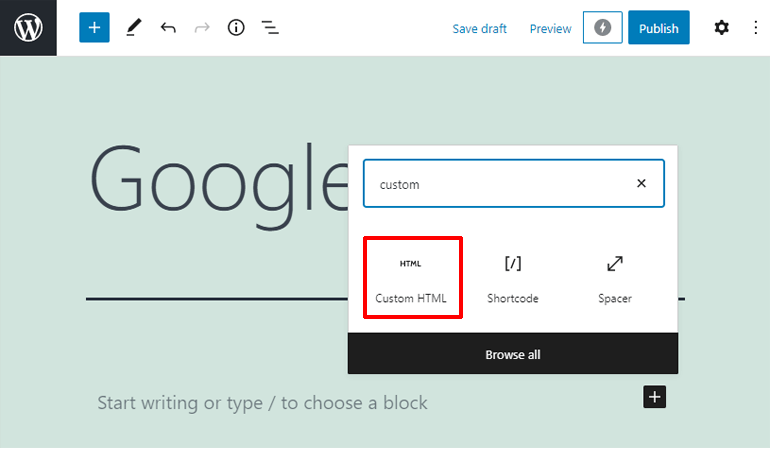
Time to paste the code. Simply, paste the code into the block and the Google form is now on your WordPress page.
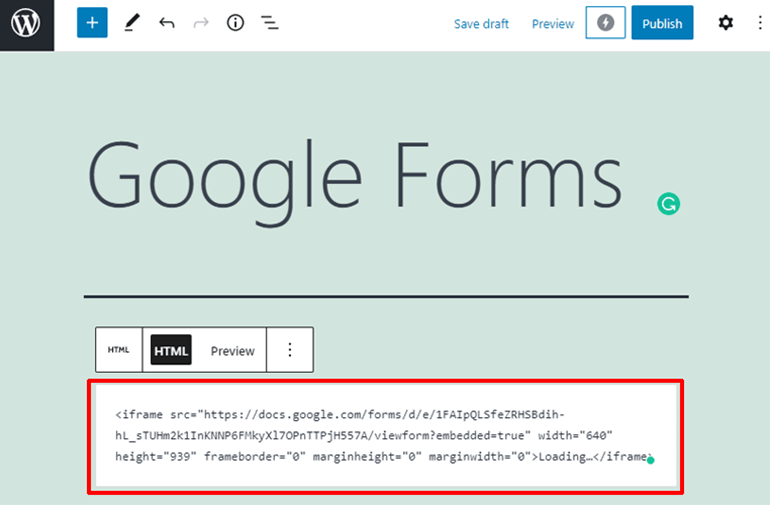
If you want to see how the form will look on your page, click on the preview button on the Custom HTML block’s toolbar.
Well, this tutorial holds doable only if you’re using the block editor in WordPress. But if you still use a classic editor (although we don’t see a reason why) you’ll have to follow the tutorial below.
For the classic editor, you’re gonna have to whip out the text editor by clicking on the tab that says Text on the top right corner of the toolbar.
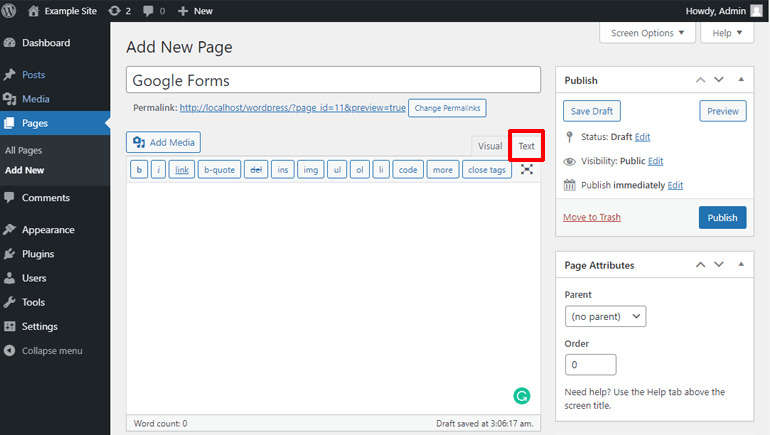
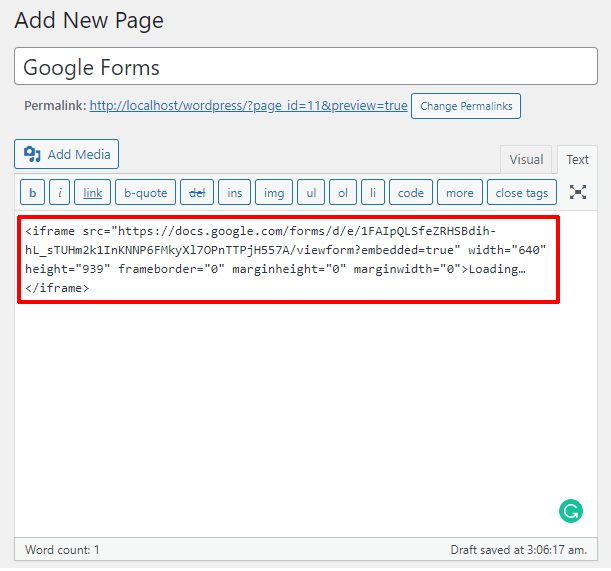
Once you’ve switched to the text editor, paste the embed code wherever you want in your WordPress pages or posts. And doing so, you’ve already summoned the Google form into your WordPress website.
If you go back to the visual editor, you should be able to see the Google form.
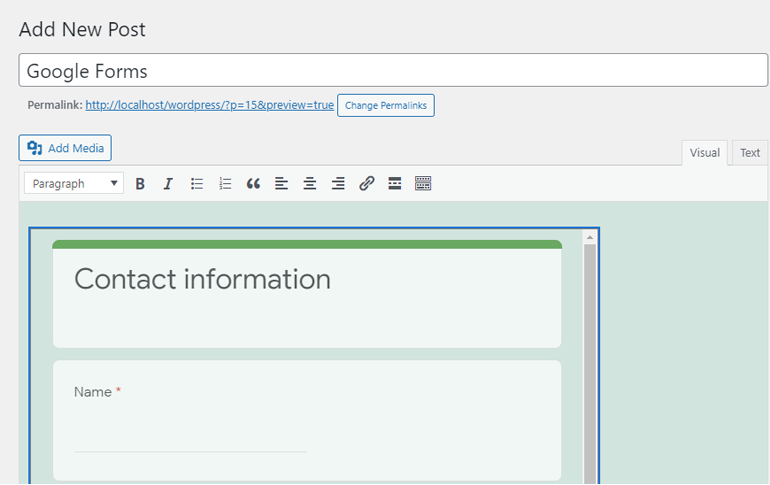
And, to see what the form will look like to your visitors, simply preview the page.
Wrapping it Up
One of the main reasons people use Google Forms is because it’s very easy to share. All you have to do is create a form, get the embed code and paste it.
It’s true that the best WordPress form builders like Everest Forms, User Registration, are getting more powerful and rising as strong competitors to Google Forms. And in terms of features, they might already have surpassed it. But when it comes to shareability and simplicity, Google Forms is still a great choice.
Hope you enjoyed the article on how to embed a Google form in WordPress. If you did, share it. Let it find more places on the internet to be. And if you have any feedback or comment, please feel free to share that with us too.
Want to read more? You’ll also love our article on How to Create a WordPress Popup Form?


![Zakra 3.0 | Zakra Pro 2.0 Release [Major Updates!]](https://i.ytimg.com/vi/g3rifl7kWvg/maxresdefault.jpg)