Do you want to create a WordPress Online Booking Form for your hotel? Hop in.
Online Booking Forms in WordPress are forms used for early reservations of hotel rooms, accommodations, appointments, and more. To survive in the competitive online world, you need a good presence. And if you own a hotel, you need an aesthetic one. A well-prepared booking form will do exactly that for your business.
In this article, we will show you how to create an online hotel booking form in WordPress. Additionally, we will also show you how to integrate your form into a calendar, so that you can do more with it.
Why do You Need a WordPress Online Hotel Booking Form?
In a world where most corners of the world have the internet, you wouldn’t want your customers to make a booking through a personal visit, or a phone call, or email. They simply don’t give you the comfort and guarantee that your customers are able to do bookings well.
However, if your business has a website, then you can guarantee the booking to your customers. All you need to do is create, edit, and upload a restaurant booking form. After that, you integrate it with your calendar.
Then you and your customers will get a notification for every successful booking. And, you’ll always have your calendar to review the bookings and do more. This will:
- Save your time and work
- Make it easier to manage bookings
- Guarantee the safety of customer’s bookings
- Ultimately, strengthen your presence in the business and online world
There’s more to your hotel booking form. And we shall explore that together in this article.
How to Create a WordPress Online Hotel Booking Form?
The concept of creating an online hotel booking form in WordPress is simple. Create a WordPress form, upload it, integrate it into the calendar. And of course, you’re going to use a very beginner-friendly platform for that. But there are many smaller steps in there and you may need assistance with some.
It’s always nice to have a good knowledge of how to do something before actually doing it. So here’s a step-by-step guide on creating an online restaurant booking form for WordPress.
First, you need to choose a plugin for creating your online hotel booking form for your WordPress website. Choosing a plugin can be hell in WordPress, we’ve been there. So, we already picked the best form builder plugin for creating an online booking form for your WordPress website.
Everest Forms, the easy drag and drop form builder is the best form builder plugin you can get. It’s very beginner-friendly and well documented. Using it, you can create contact forms, online surveys, booking forms, or any type of online form with ease.
And if you ever need help with anything, Everest Forms has awesome support. We can’t mention all the features here. Let’s explore them while we create our own online Hotel Booking Form in WordPress.
Step:1 Installing Everest Forms
Before starting to create your restaurant booking form, we need to install Everest Forms. So,
First, log in to your WordPress Dashboard.
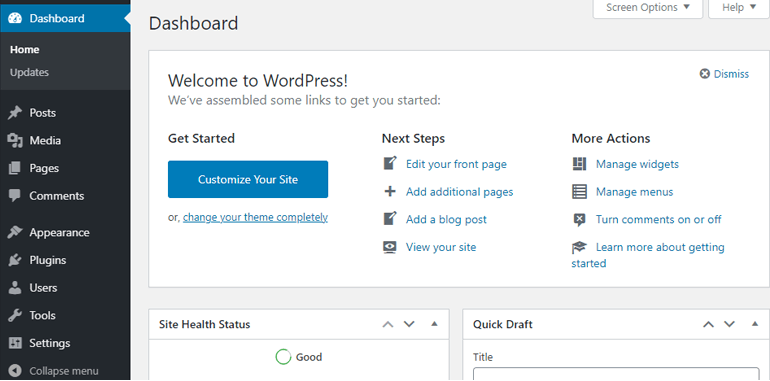
After that, go to Plugins >> Add New.
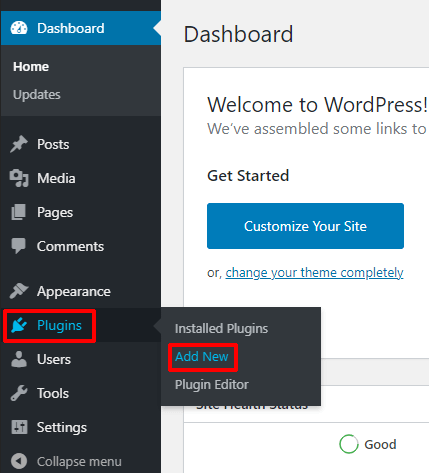
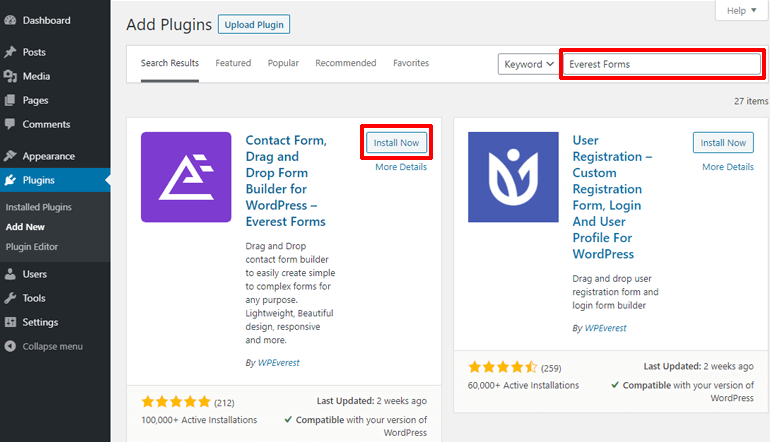
In the search bar of the plugins repository, type Everest Forms. This will bring you the Everest Forms and related plugins. Hit Install in the pane dedicated to Everest Forms.
After you’ve installed Everest Forms, activate it by clicking on the Activate button in its pane.
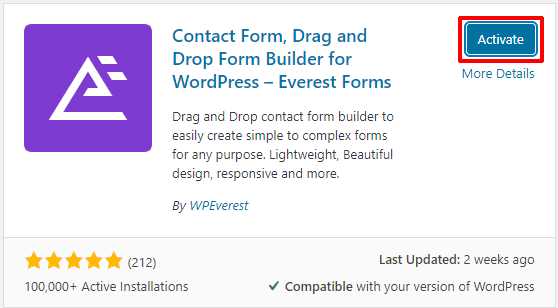
Done! Everest Forms has been activated. You’re one step closer to creating an online hotel booking form for your WordPress website.
Step-2: Installing Everest Forms Pro and Add-ons
What you just installed is the free version of Everest Forms. It’s a handy tool if you want to create a job application form, contact form, and else. But we want to do more with the form, like integrating it with payment services and other web applications. So, we will need the pro version of Everest Forms.
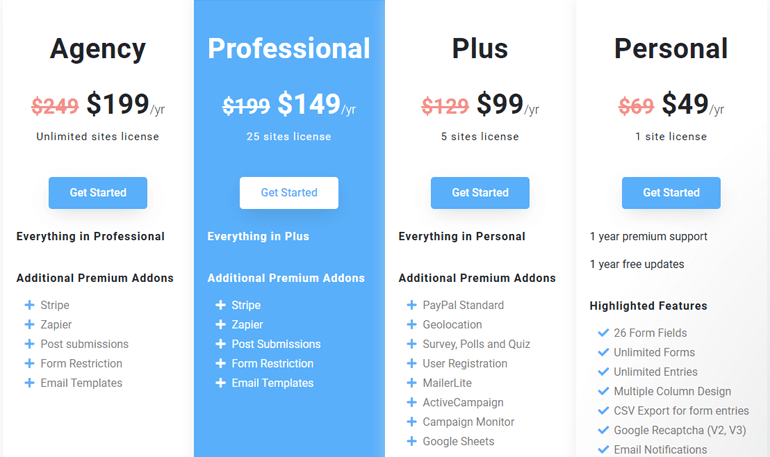
To install the pro version of Everest Forms, head over to the pricing page of Everest Forms. There, you’ll see four different plans: Personal, Plus, Professional, and Agency. All the features of Everest Forms are included in the Professional plan with licensing for up to 25 sites. So, we need a professional plan.
And, once you fill in the required information, you’ll also create a WPEverest account. All the premium plugins and addons along with license keys will be stored on your account page.
1. Installing Everest Forms Pro in Your Site
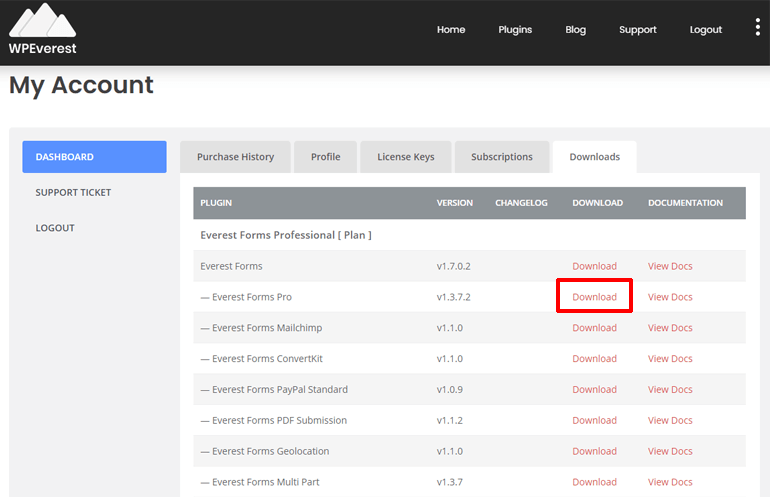
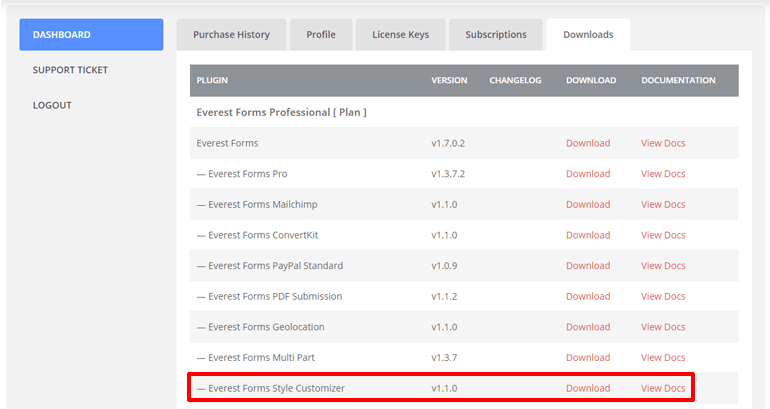
After the purchase is made, head over to your account page. There, under the downloads tab, zip files of all the plugins and add-ons are waiting for you.
Download the Everest Forms Pro plugin from there.
Under the License Keys tab on your account page, copy the License Key, because you’ll be asked for it.

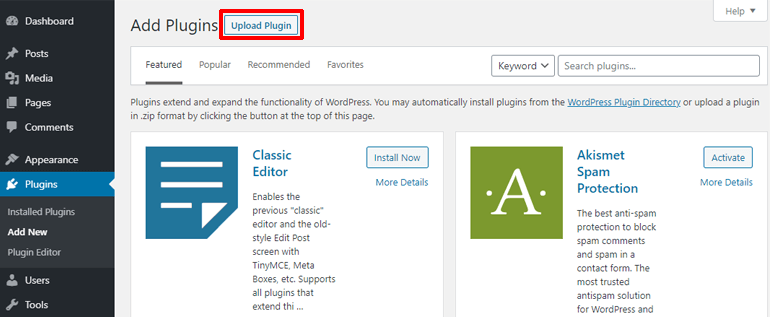
Time to add this plugin to your WordPress Dashboard. In your WordPress Dashboard, go to Plugins >> Add New.

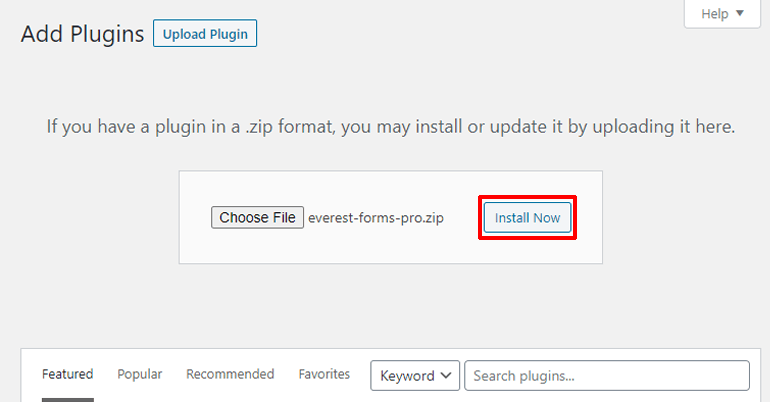
Then click on the Upload Plugin at the top of the page.
At this point, you should be able to see the area for uploading the plugin.
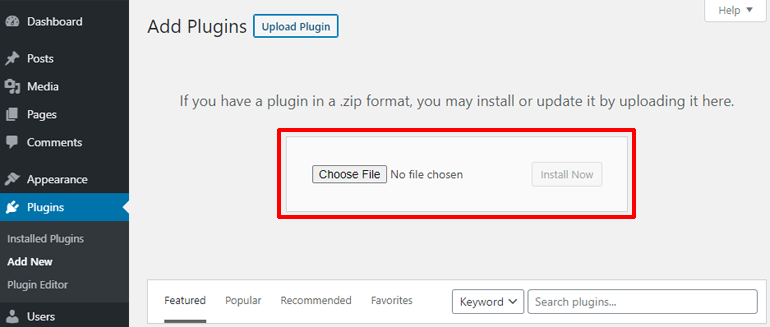
Simply drop the Everest Forms Pro plugin that you downloaded, in here. Then, click on the Install Now button.
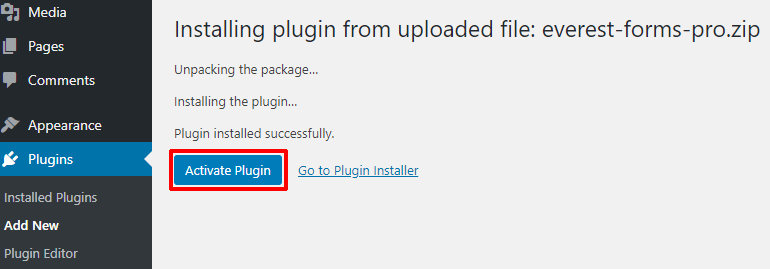
Now activate the plugin by clicking on the blue Activate Plugin button.
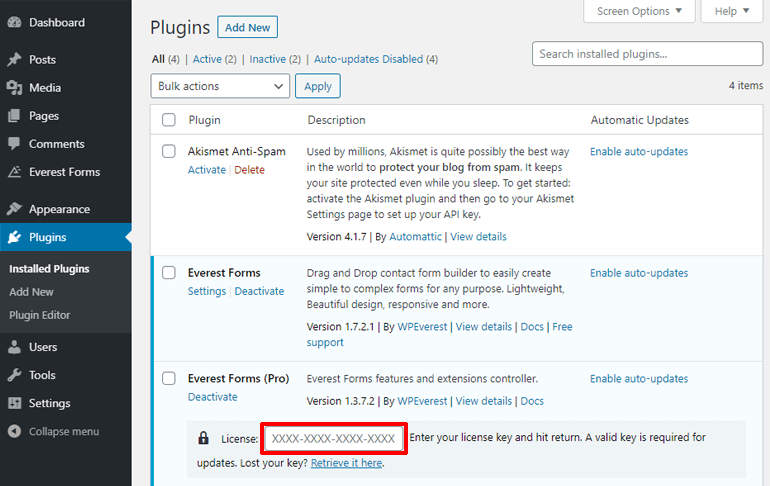
You will then be redirected to the page where you’ll have to enter the license key. Paste the license key that you copied from your account page here. Finally, hit return (Enter) to activate your license key.
Awesome! Everest Forms pro is added to your site and ready to give you an online hotel booking form.
2. Installing Style Customizer and Zapier Add-ons
Everest Forms alone can build awesome forms for your site. But Everest Forms can do more with powerful add-ons like style customer and Zapier.
The style customizer add-on will let you customize everything in your booking form. And we will be using the Zapier add-on to integrate our WordPress online hotel booking form to Google Calendar.
So, let’s install these two add-ons before we finally start creating our online hotel booking form for WordPress.
To get started, go to your account page of Everest Forms. Under the downloads section, download the two add-ons: Style Customizer and Zapier.
After that, head over to your WordPress Dashboard. Then, go to Plugins >> Add New >> Upload Plugin. Drop the zip file of the add-on that you downloaded here and hit the Install Now button.
Lastly, activate the plugin by clicking on the Activate Plugin button.
Congratulations! You have successfully installed the required add-ons. You can finally start creating your WordPress online hotel booking form.
Step-3: Creating a WordPress Online Hotel Booking Form
Now that everything is set up, we can enjoy the drag and drop form builder to create our online Hotel Booking Form
1. Getting Started with Templates
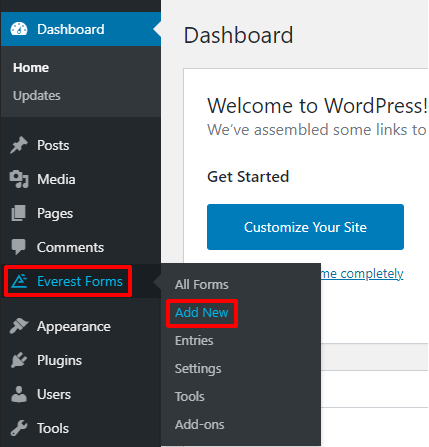
On your WordPress Dashboard, you should now see a new tab named ‘Everest Forms’ added to your dashboard menu. When you hover your mouse over it, you’ll see different options pop to the right. Click on the ‘Add New’ option.
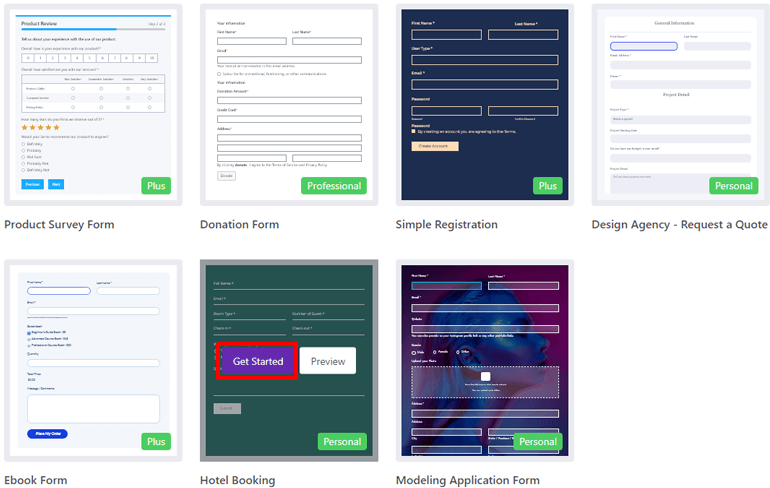
This will take you to the templates page of Everest Forms. Over a dozen templates are waiting to be discovered by you.

Scroll down, look at the template that will suit you the most. Since we are talking about an online hotel booking form for your WordPress website, we chose the Hotel Booking Template.
Hover over the template and you’ll see two options: Get Started and Preview. Click on Get Started.
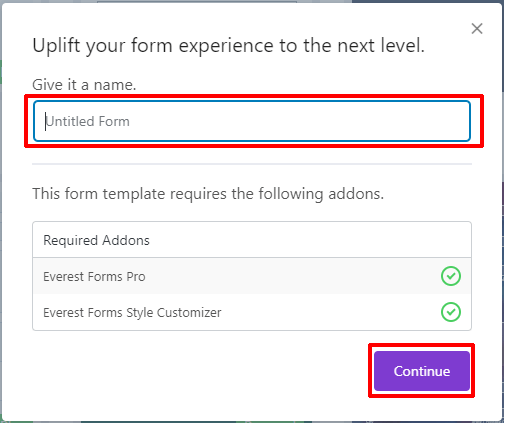
You will now be asked for a name for your booking form. Give it a name you like and click on Continue.
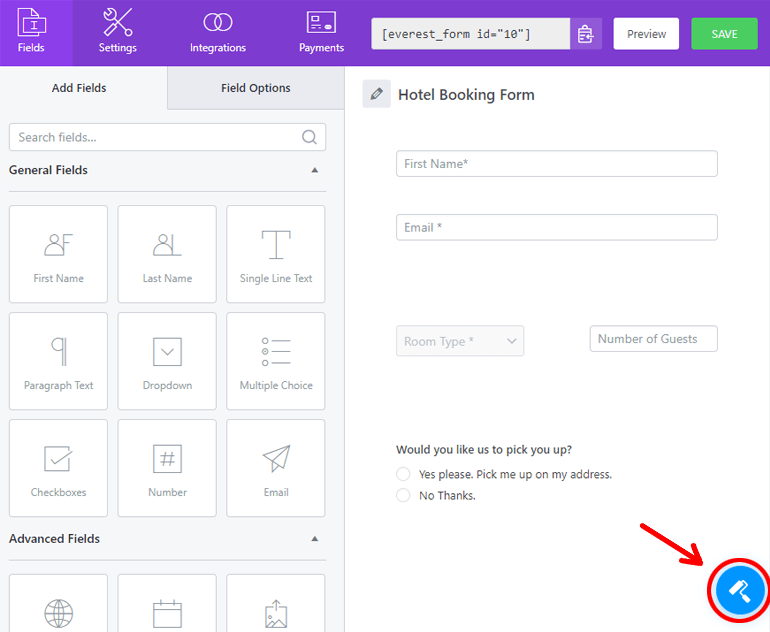
Welcome to the form editor of the Everest Forms plugin. Here, you will see many different options to customize your online booking form.
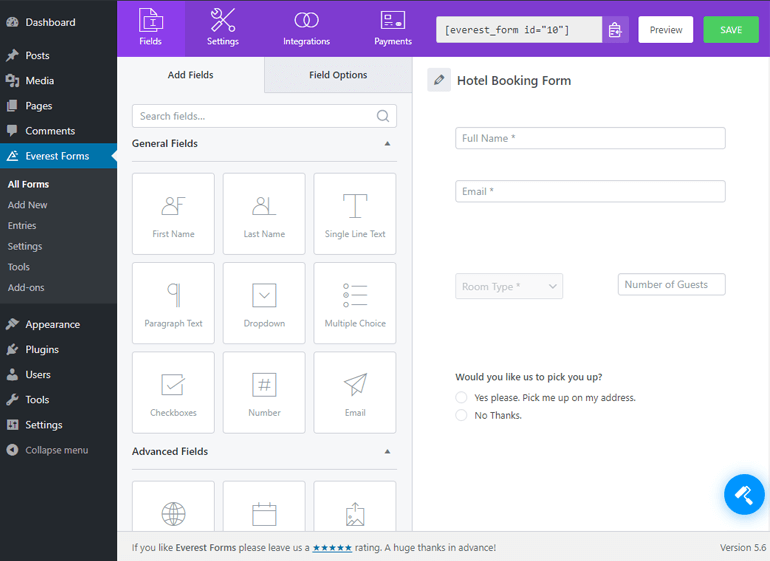
On your left, you can see different fields you can add to your booking form. The fields that are in your form are shown on the right. The fields you can add to your form are categorized into different sections.
- General Fields
- Advanced Fields
- Payment Fields
- Survey Fields
There are fields for everything you need in your form including Date/Time, Multiple Choice, Signature, Range Slider, and many more. Feel free to check them out while creating your online hotel booking form.
2. Adding and Arranging Fields
To add a field simply drag the field and drop it on the right. For example, we want to know about what date and time the booking is to be made. So, we’ll simply drag the Date/Time field under Advanced Fields and drop it on the right.
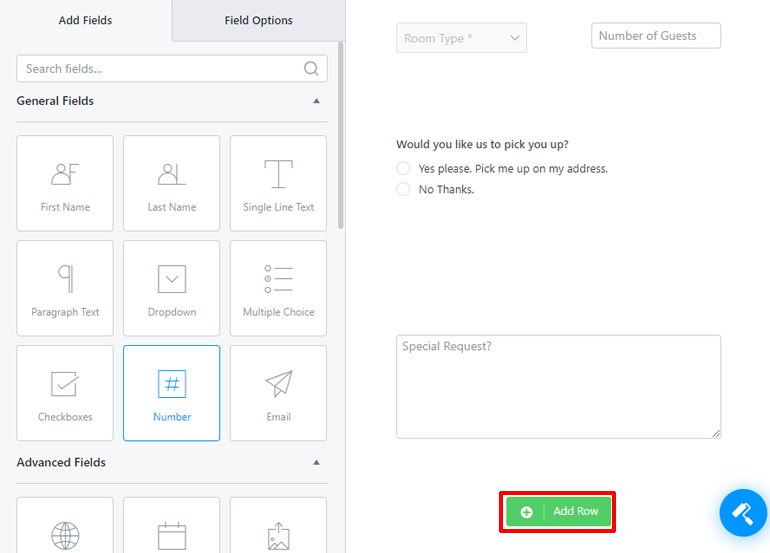
If you need an additional row in your form. Click on the ‘Add Row’ button at the bottom of the right section.
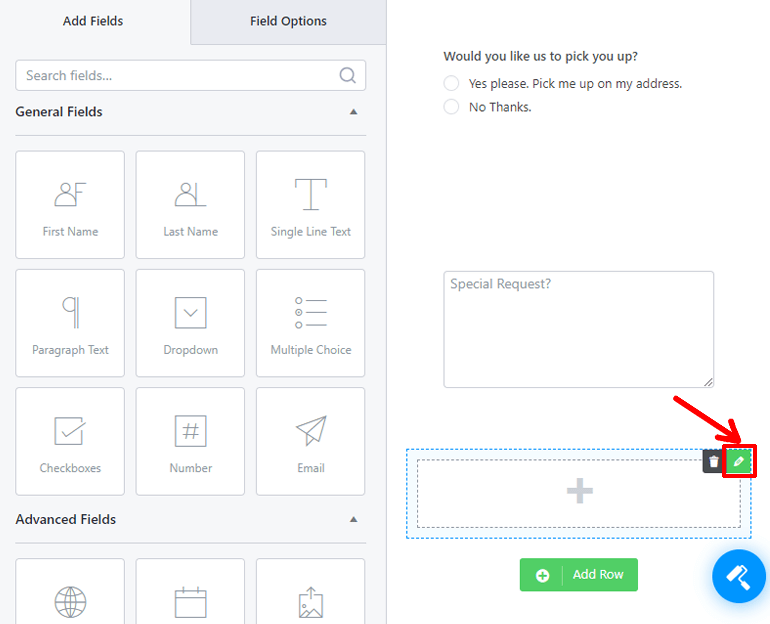
And, if you need to add two items in one row, then hover your mouse over the specific row. On the top-right corner of that row, you’ll see two icons, a dustbin, and a pencil. Click on the pencil icon.
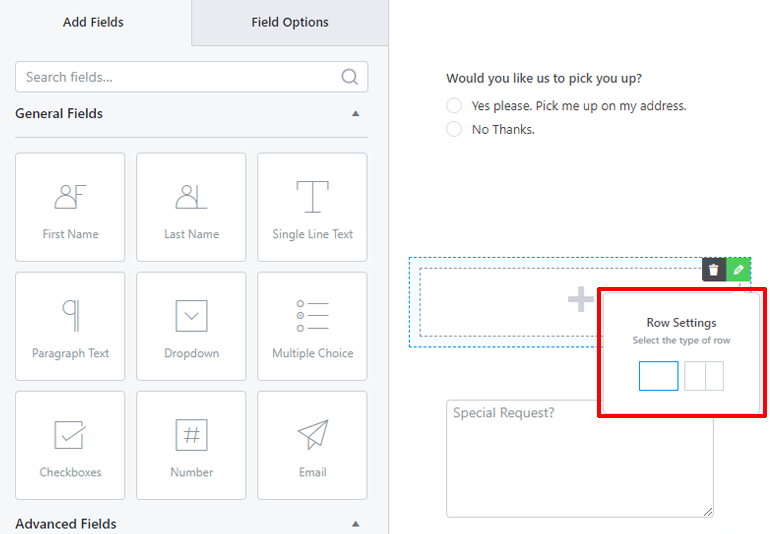
When you click on the pencil icon, the row settings for that row will dropdown. There, you can choose the number of columns for your row.
If you need to re-arrange your row, then hover your mouse over the row. You’ll see dotted lines around your row. Drag the row by clicking somewhere near the outermost line and drop it where you want it to be.
However, if you need to re-arrange the field in a different row, drag the field by clicking inside the innermost lines, where your field is. Then, drop it in the row which suits it.
And, that’s how you can add and arrange different fields to the online hotel booking form for your WordPress website.
3. Field Options
We have now added different fields to the online booking form for our WordPress website. And now it’s time to edit the properties of those fields.
On the left section of your form editor window, you can see two tabs: Add Fields and Field Options. Click on the ‘Field Options’ tab.
There, you’ll see different options for configuring what a form field does. To configure a field click on it and it’ll show you the field options for that specific field.
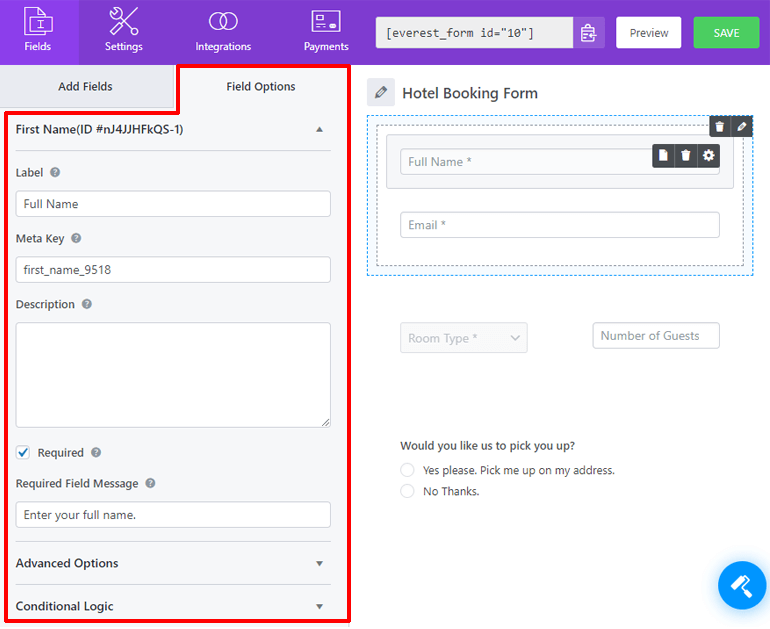
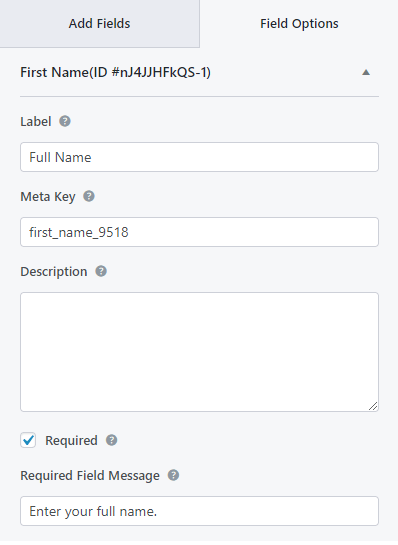
The most common field options are Label, Meta Key, Description, Hide Label, Required, and Required Field Message.
The Label option is for the name of your field. The Meta Key is the name for your field in the database. The Description option is for describing your field to the visitors.
The Required option is a checkbox. Checking it will make the field mandatory. And, the Required Field Message is for when users try to submit the form without filling the field.
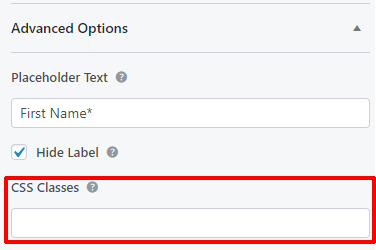
You can find the Hide Label option under the Advanced Options section. Checking this option will hide the label of your field.
Another common option under Advanced Options is placeholder text. Placeholder text is the text that appears in the field until users give their own data.

Other fields you might like are CSS Classes and Conditional Logic. If you know CSS, then you can do more to the field with the CSS Classes option.
The Conditional Logic option is for adding interesting functionality to your field. When you check the ‘Enable Conditional Logic’ option you will see the conditional rules option.
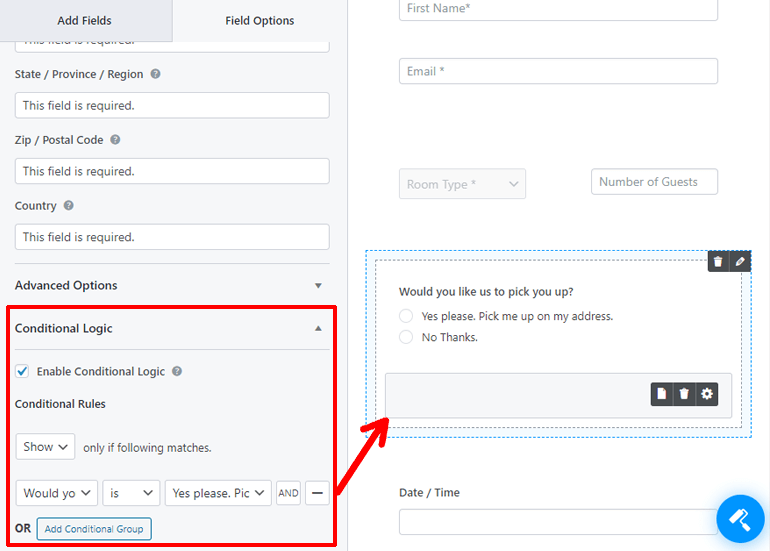
With these options, you can choose to show or hide this field when another field has a specific value.
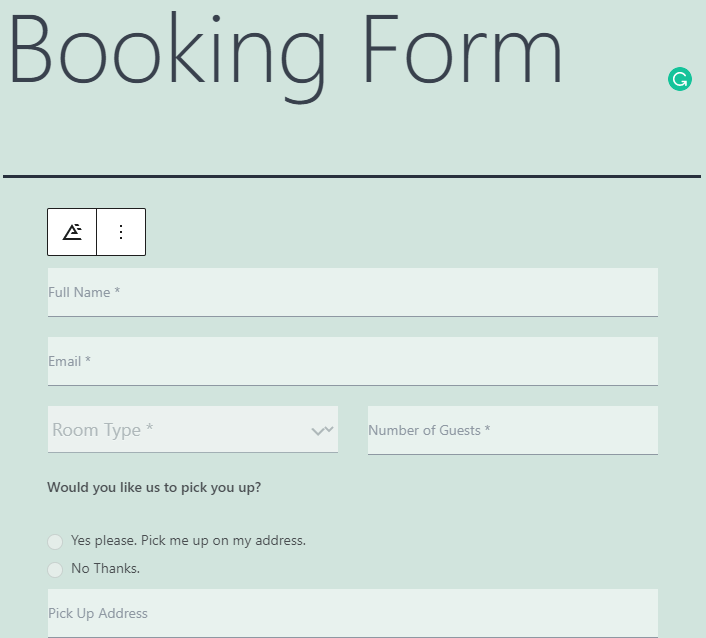
For example, in the Hotel Booking Form template, the field for the ‘Pick Up Address’ only shows when you click on ‘Yes Please.’ under the “Would you like us to pick you up?” field. However, it doesn’t show up when you click on ‘No thanks’.
Also, individual fields have their own unique field options. Check them out while configuring the fields of your WordPress online hotel booking form.
Step-4: Customizing Your WordPress Online Hotel Booking Form
You have added and configured fields for the online hotel booking form or your WordPress website. But that’s not the only editing you can do to the booking form. You can customize its looks as well. And Everest Forms has a mountain of options ready for you. Get it? Everest Forms – Mountain of options?
To begin customizing your online booking form, click on the Form Designer icon on the bottom-right corner of your form editor window.
Personally, we think this form looks great in itself. But you could make it even better with the options provided. And to make it easy for you, Everest Forms provides an interface like the WordPress Customizer.
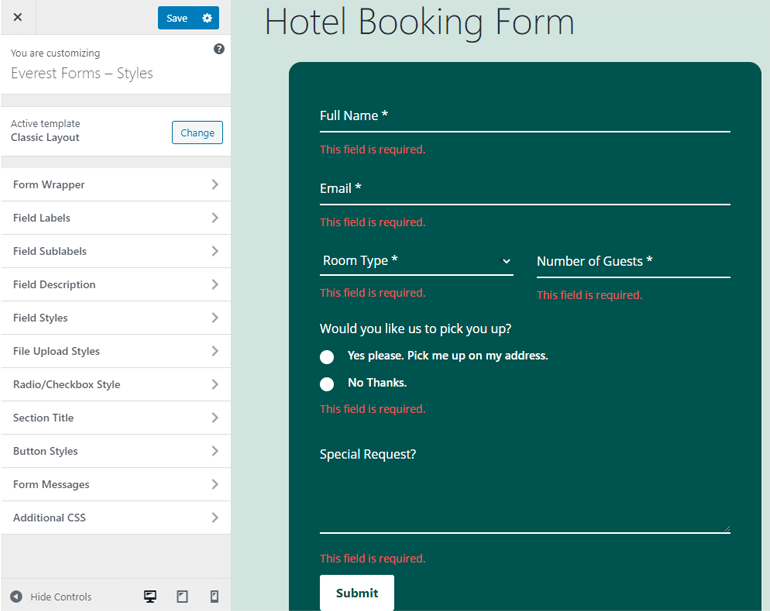
On the left is the customizer menu. Here lie the options for you to customize your form’s style. And, on the right is the live preview of the form. Yes, you can view the change happening to our form in real-time.
Of course, we’re not going to cover every single option under every single tab. We’ll leave some of them for you to explore. Besides, it’d take forever to read this article if we did. So, we’ll just cover the common and important ones.
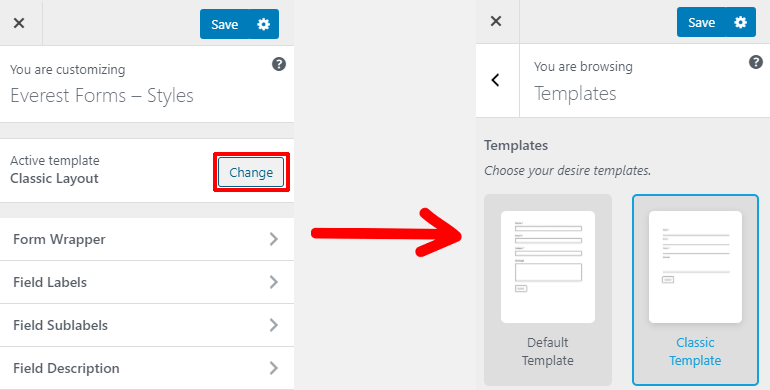
The first option you’ll see is the template option. You can click on the ‘Change’ button to switch between the classic and default layout.
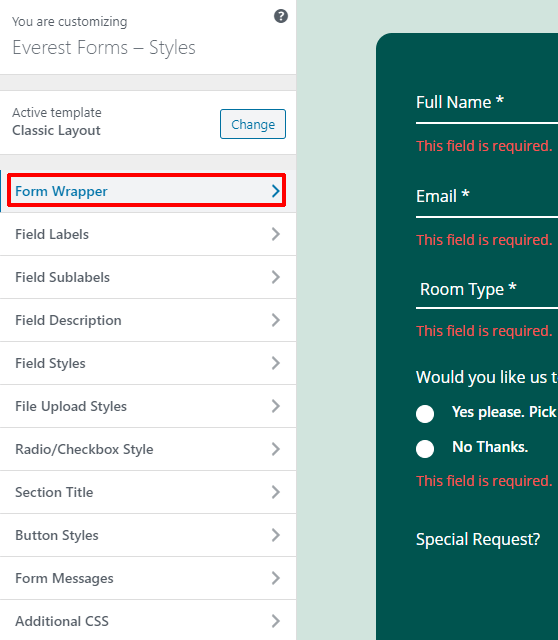
After that, there are tabs for different purposes. The first tab is the ‘Form Wrapper’. This option styles the background, font, and border of your form.
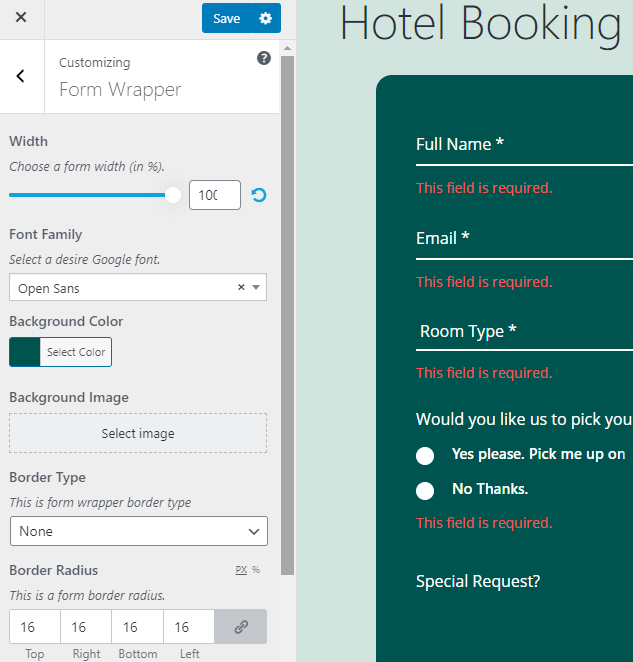
Inside the form wrapper tab, you’ll see options to choose the width, font, background color and image, border type, radius, etc. You can also change the padding and margin of the form.
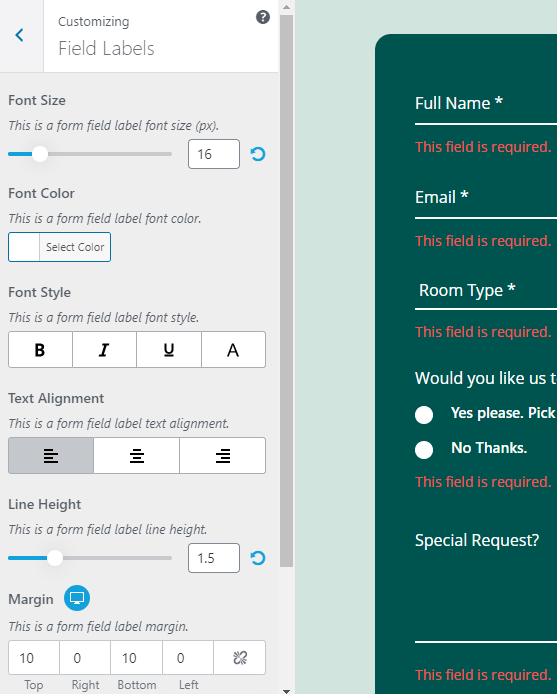
After the form wrapper tab, there are tabs for individual components of the form like Form Labels, Form Sublabels, Form Description, etc.
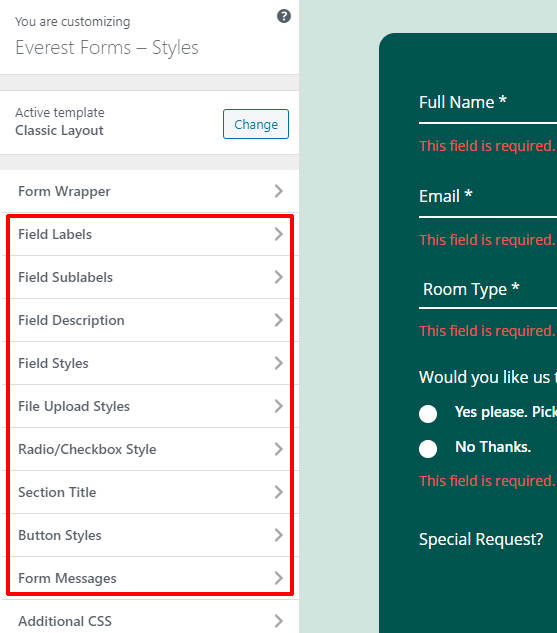
These tabs are responsible for changing the font size, color, style, text alignment, margin, padding for those components of your online hotel booking form in WordPress.
At the bottom of the customizer menu, you’ll see two tabs. Form Messages and Additional CSS.
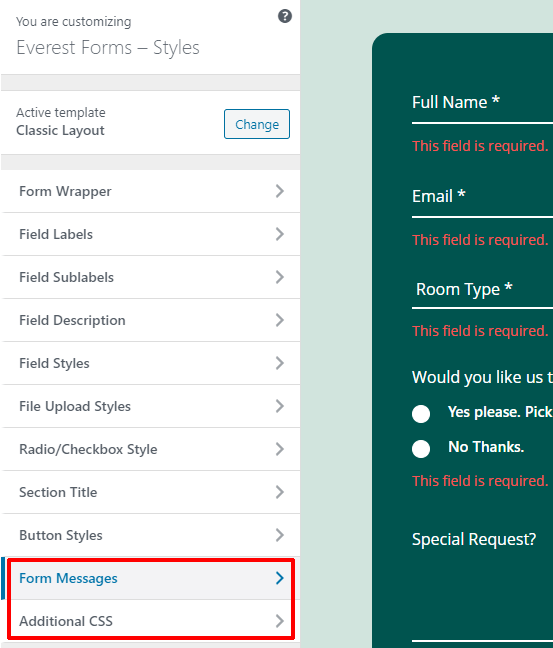
The Form Messages tab is used for styling the form success, error or validation message. Click on the Form Messages tab and then on the individual options to begin styling.

Lastly, you can use the Additional CSS tab in the customizer to style your form using CSS.
And finally, to save your contact form, hit the blue save button at the top of the customizer menu.
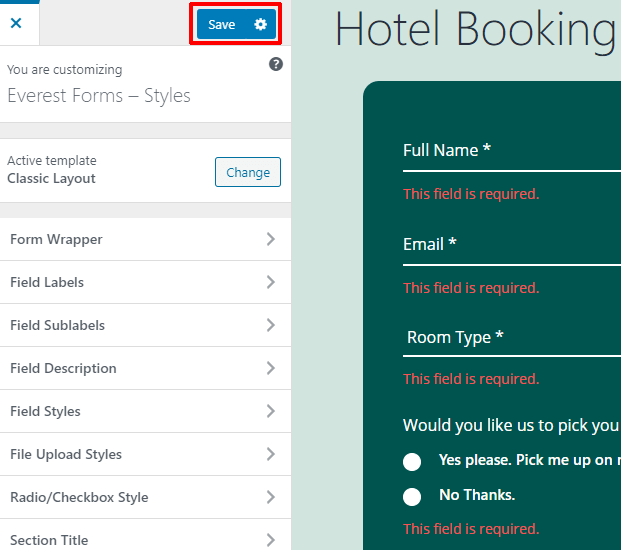
The WordPress online booking form for your hotel has been successfully created, edited, customized, and saved.
Step-5: Changing the Settings of Your Online Hotel Booking Form
After you’ve created an online booking for your hotel’s WordPress website, most of the work related to the form is done. All that remains is how to configure the form and publish it. Configuring means reviewing and changing the admin email, auto-reply, button texts, etc. So let’s jump into it.
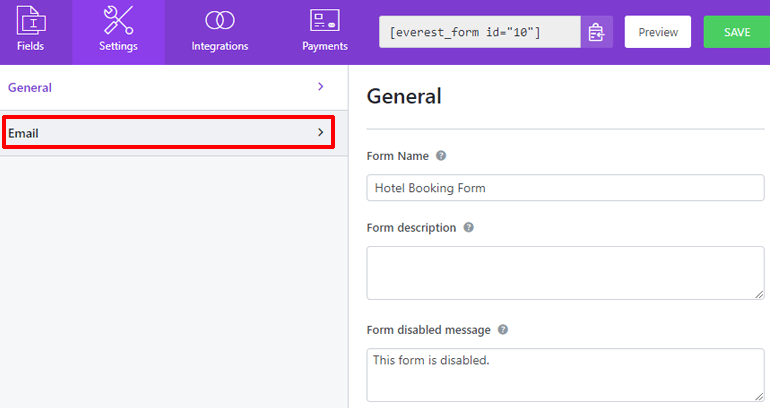
In your form editor window, you can see different tabs at the top bar, namely: Fields, Settings, Integrations, Payments. We just created, edited, and saved the form using the Fields tab. Now to configure its settings, click on the Settings tab.
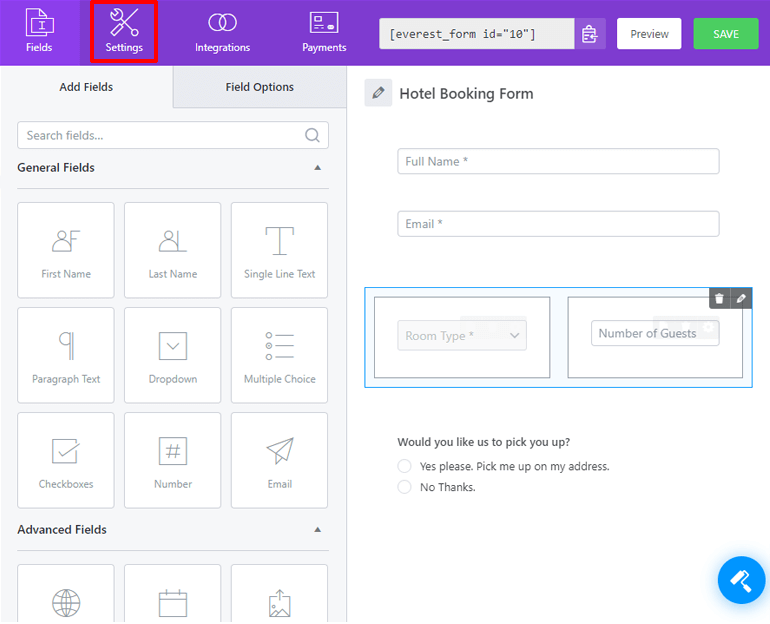
Inside the settings tab, you’ll see two sections, General and Email.
1. Configuring the General Settings
In the General section, you can edit your form’s name and description. You can also edit the message for when the form is disabled or successfully submitted.
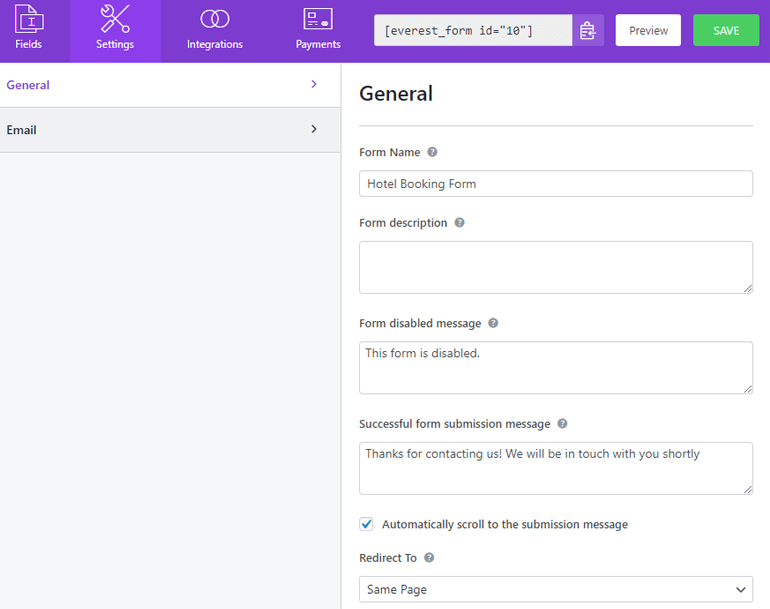
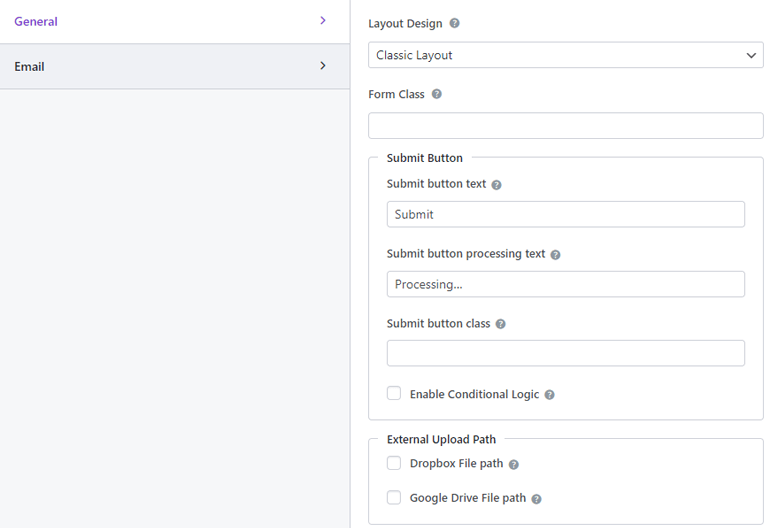
If you scroll down, then you can see more options. With the Redirect To option, you can redirect users to a specific page after form submission. You can change the form’s layout design and CSS class as well
The options after that deal with the submit button. You can change the text in the submit button while it’s processing as well. You can even apply conditional logic to the submit button.
The General section mostly deals with your online hotel booking form prior to its submission.
2. Configuring the Email Settings
The Email section will deal with the options after your form submission. To begin configuring email settings, click on the Email section.
Under the Email section, you can configure the email notification for when someone fills your booking form.
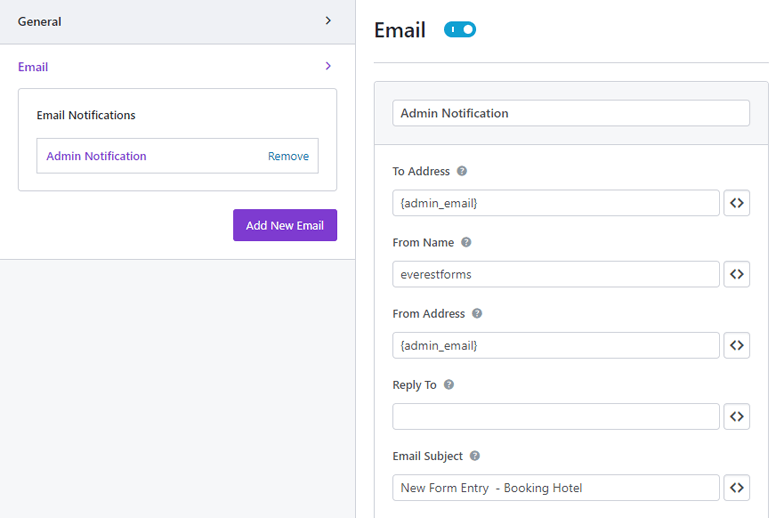
At the top, you’ll see the toggle button for email notifications. Then, there is a field where you can put the name of your notification.
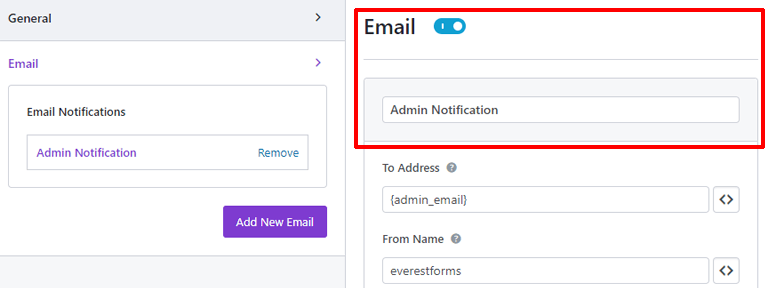
The To Address option deals with the email to which the notification will be sent. By default, it has a shortcode value of {admin_email}. This means the notification will be sent to the admin of the website.
In the Form Name option, enter the name of the form to appear in your notification.
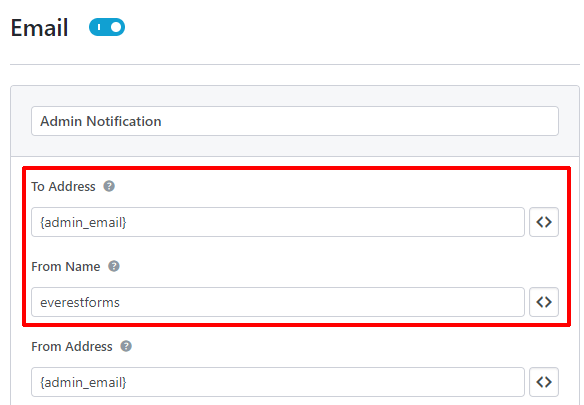
These two settings are for the email notification you receive. Now for the email, your visitors receive when their form submission is successful.
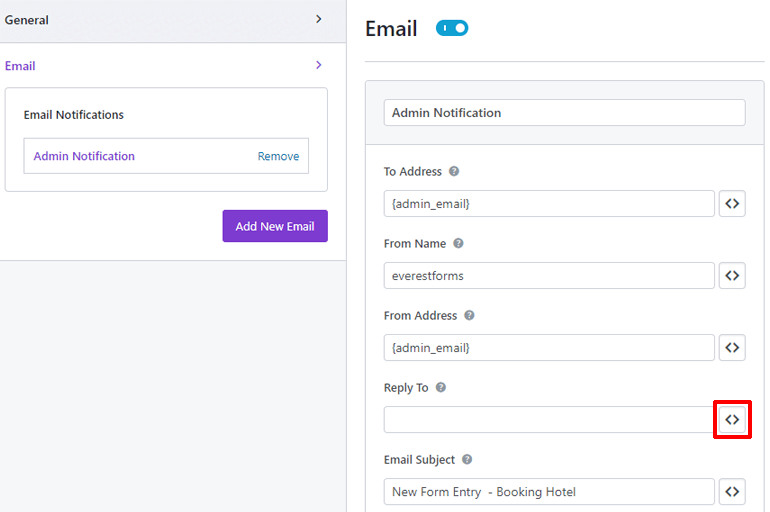
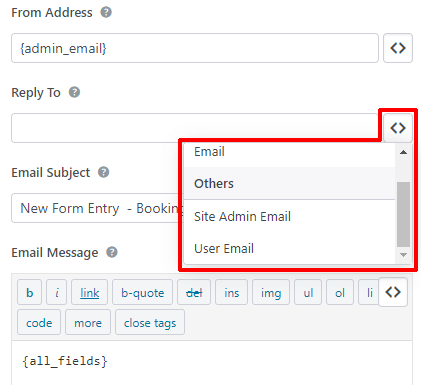
In the From Address option, enter the email from which you want to send a message to your visitors. And, in the Reply-To option, choose who will get the message. Now, you don’t know yet what the email addresses of your visitors are. So in this case, we’ll use a shortcode. Press the shortcode button on the right.
Now scroll down and you’ll see an option called User Email. Click on it. The shortcode is applied and the email will now go to whatever address your visitor has.
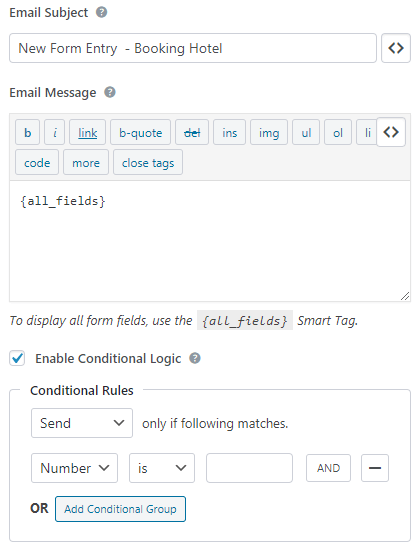
Next, in the Email Subject option, enter the subject of the email you want to send to your visitors. And, under the Email Message section, type your message. By default, it has the shortcode {all_fields}. This means, your visitors will see all the form fields they filled up once again.
And yes, you can apply conditional logic to the email using the Enable Conditional Logic option.
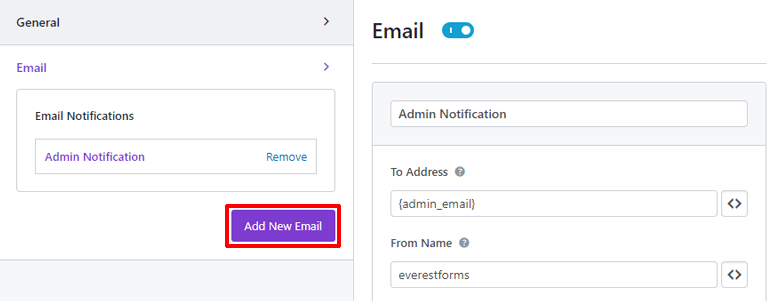
If you want to set up more than one email, then you can use the blue Add New Email button on the left, under the tab for Email settings.
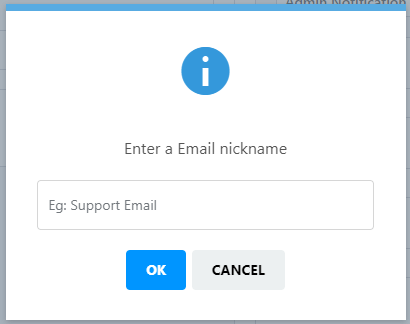
You will be asked for a nickname for your email. Type it and click on OK.
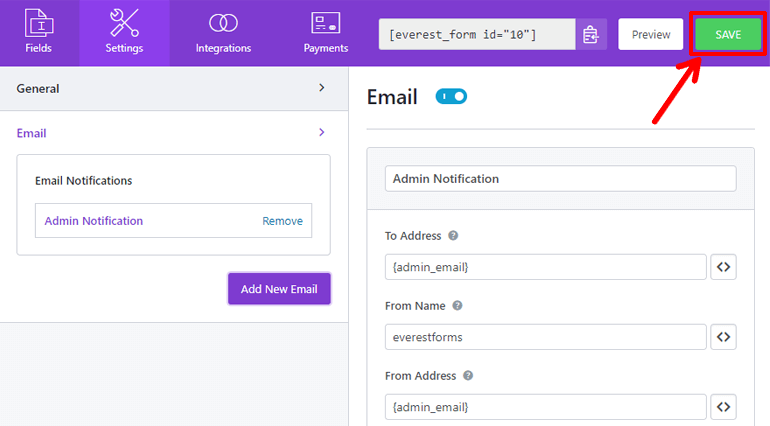
The email settings are the same for this email too. So you can easily configure any number of emails you add. Finally, don’t forget to hit the SAVE button at the top right corner to save the online booking form of your hotel.
What you just set up was the email notification and auto-reply for your booking form. You won’t have to manually reply to all the submissions, Everest will do that for you.
Step-6: Publishing the WordPress Online Booking Form of your Hotel
The online booking form for your hotel is all set. It is now ready to see the light of the outside world, ready to let visitors fill it up. So let’s give it a cozy space in your website from where it can interact with your visitors.
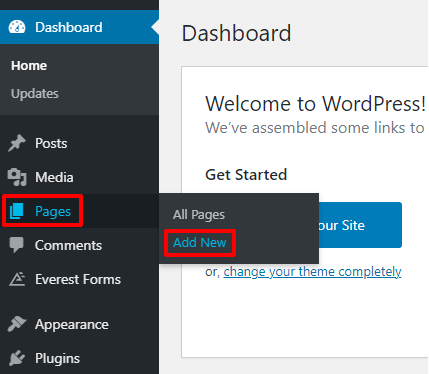
To start off, let’s create a page dedicated to our new booking form. And to do that, go to Pages >> Add New on your WordPress dashboard.
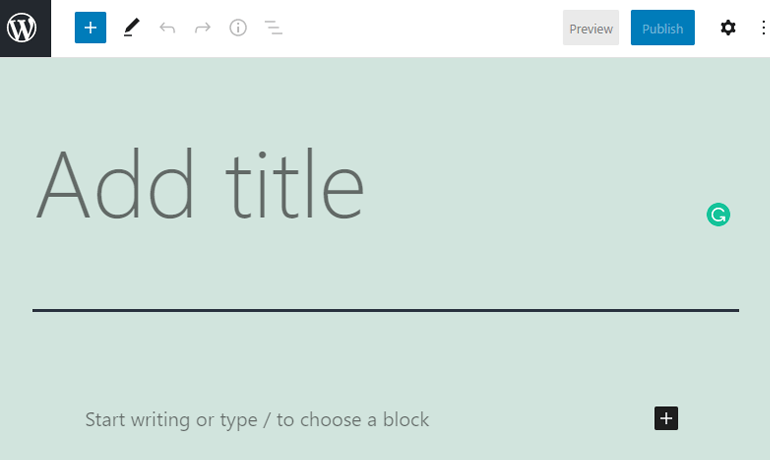
Welcome to the Gutenberg Editor of WordPress. Here, give your page a suitable title and add some content to your liking.
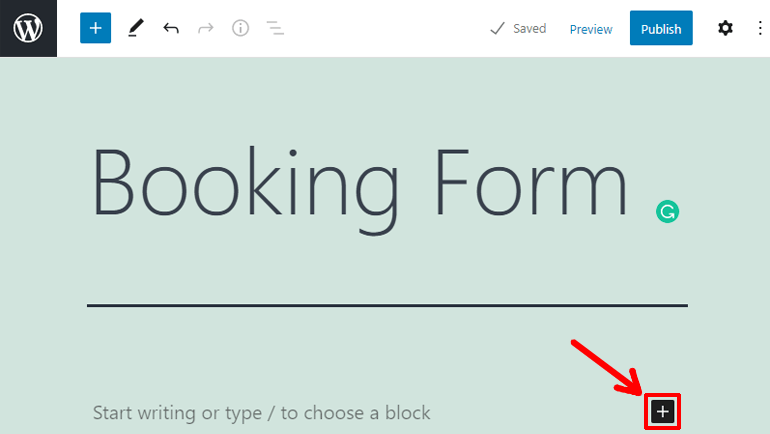
Time to add the form, click on the plus button on the right side of your page.
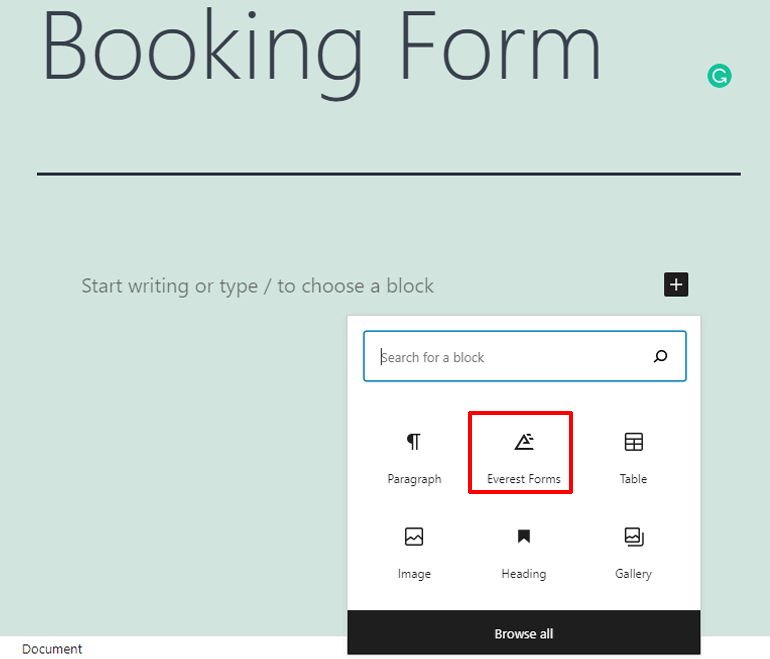
This will drop down a grid view of all the blocks you can add to your page. Click on Everest Forms. Yes, Everest Forms created a block here for you to add the form to the page.
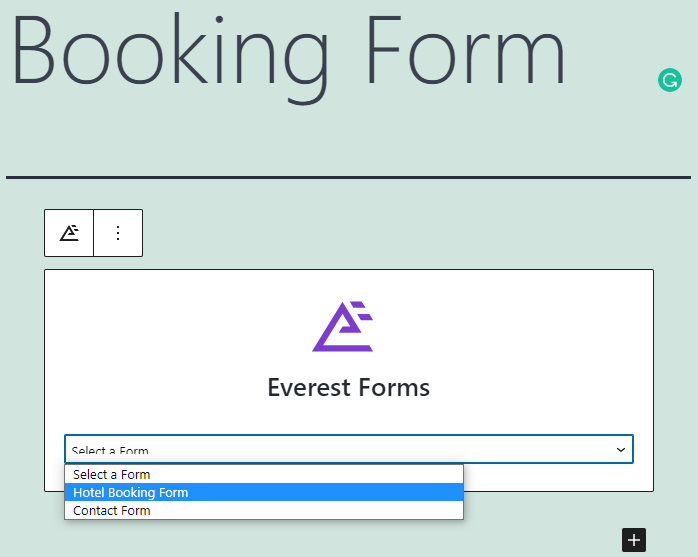
After the click, you’ll see the Everest Forms’ block added to your page. Click the Select a Form radio button, and choose your form.
Your form is now applied to the page.
Lastly, Hit the Publish button at the top right corner to publish the page with your online hotel booking form.
Step-7: Integrating Your Booking Form with Google Calendar
With the online booking form for your hotel created and configured, you’ll be notified about every form of submission. If you have a manageable number of visitors, the booking form will be adequate. But, if you have a huge number of visitors, you can’t check for every notification.
With exactly this in mind, Everest Forms lets you connect to Google Calendar so that you can manage all the bookings in one place.
The integrations with Google Calendar is done through the Zapier add-on in Everest Forms. We have already installed the add-on. So let’s get started with it.
1. Creating a Zap
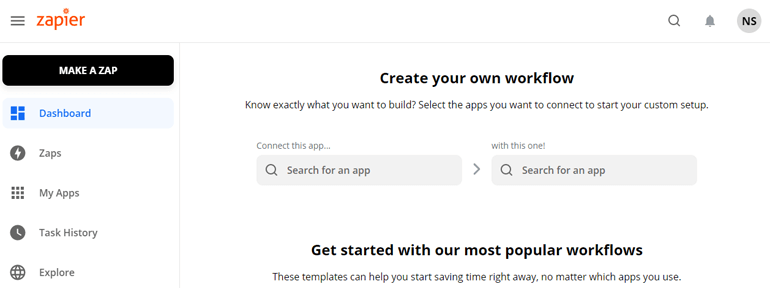
Firstly, go to your Zapier dashboard.
If you don’t have a Zapier account, then go ahead and create one. You don’t wanna miss an awesome web application.
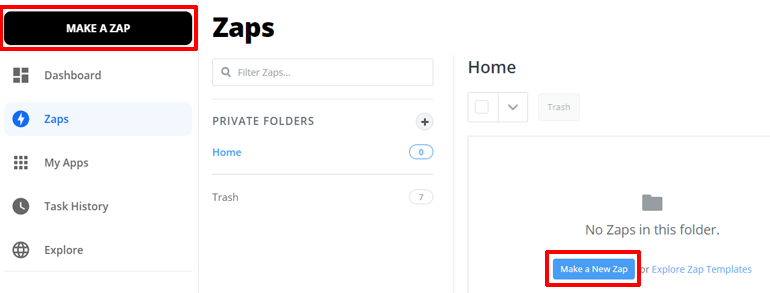
In Zapier, click on the Zaps tab on the left menu.
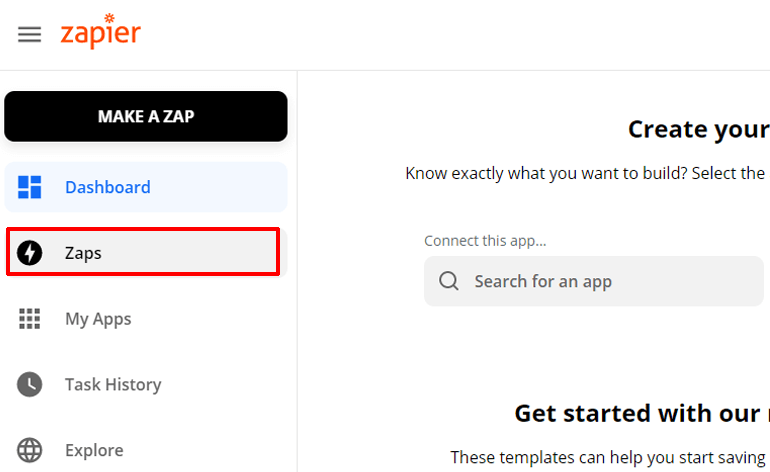
This will take you to the list of all your Zaps. Zaps are the web functions that connect two applications. If you don’t have any Zaps, click on the blue Make a New Zap button. Or, you can click on the black Make a Zap button on top-left.
Welcome, to the Zap editor window.
2. Setting up the Trigger
In the Zap editor window, you’ll set the Trigger and Action for your zap. A trigger is a cause while the action is the effect in Zapier.
First, give your Zap a name on the top left corner. Then we shall set up the trigger.
Integration of your booking form is done using a webhook. Webhooks are functionalities that relay the information between two web applications in real-time. So, our trigger in Zapier needs to be a webhook. Go ahead and search for webhook under the App Event option.
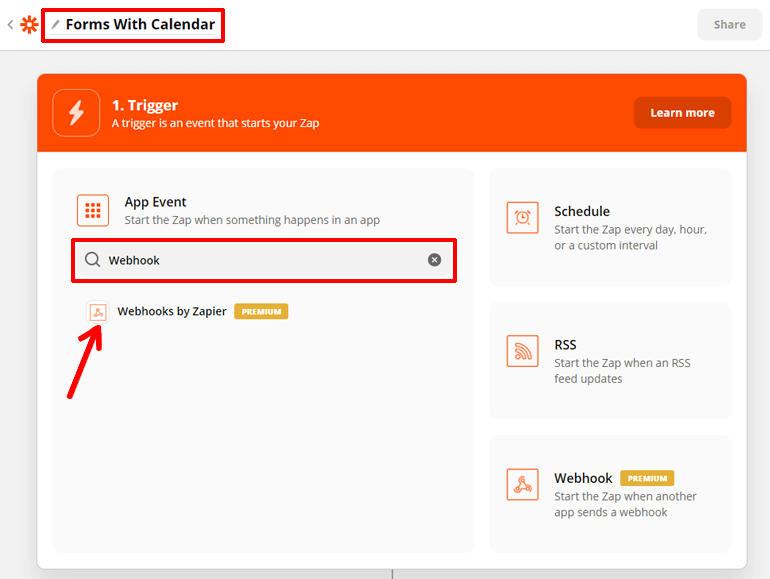
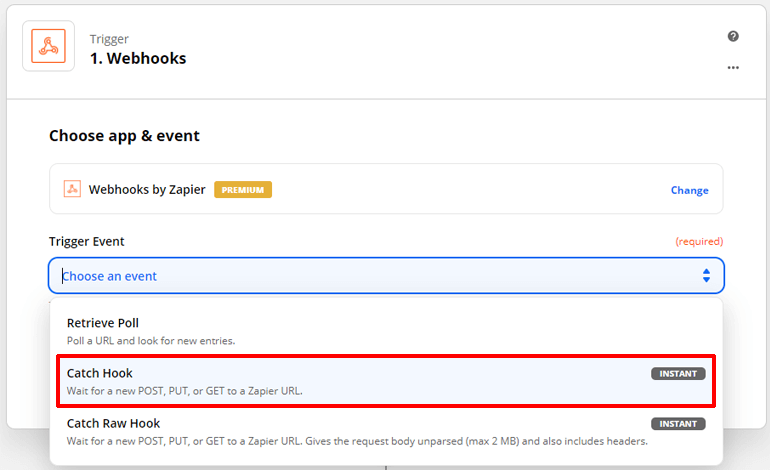
Click on the Webhooks by Zapier option. Now time to set the Trigger Event, which starts your zap. Set the Trigger Event to Catch Hook. Because we want to catch the information from our booking form.
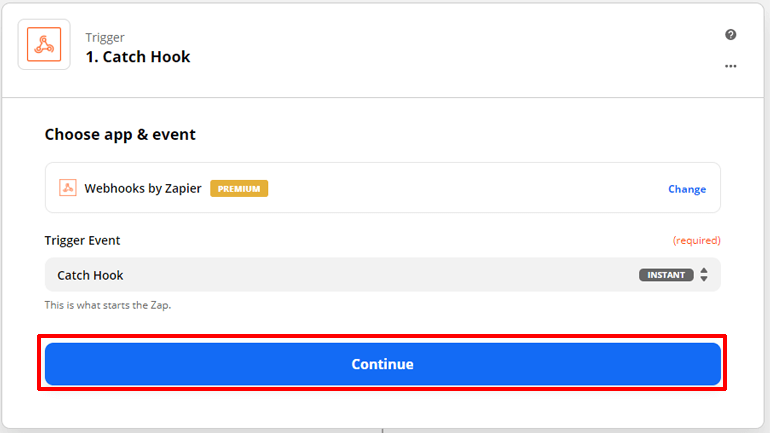
Then, hit the blue Continue button.
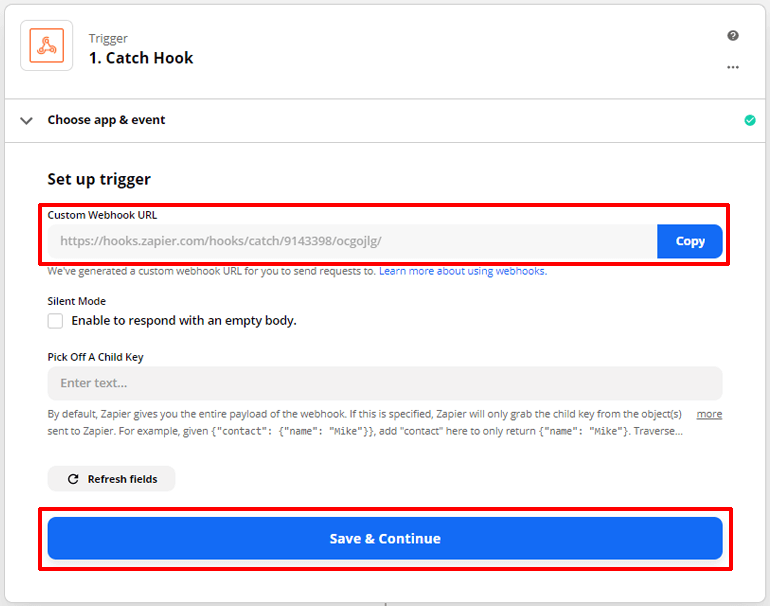
Now to set up the trigger. You’ll see a custom webhook URL under the Setup trigger option. Copy it. Then, hit the Save & Continue button.
We need to paste this webhook URL in our booking form for the webhook to work. So head over to your WordPress dashboard.
psst: create a new tab so that you won’t lose what you did in Zapier
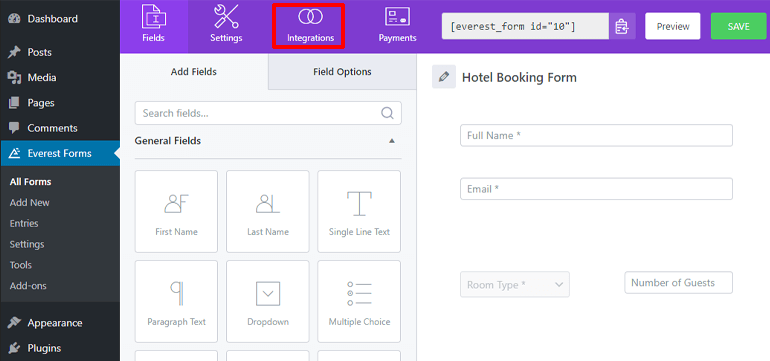
Go to Everest Forms >> All Forms. Click on the name of the online booking form of your hotel. Then, click on the Integrations tab at the top bar of your form editor window.
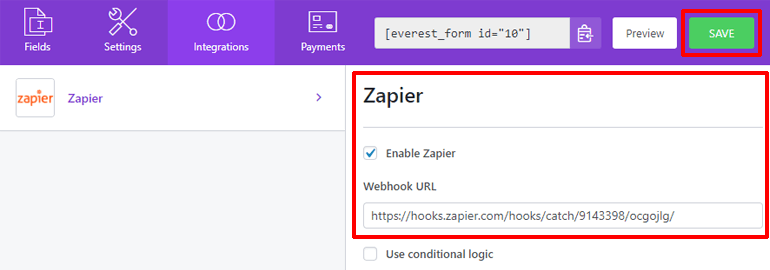
Here, you’ll see Zapier added to your Integrations tab. Check the Enable Zapier option. And, paste the webhook URL that you copied from Zapier on the Webhook URL option. Finally, hit the SAVE button at the top right corner to save changes to your form.
The webhook will now be the medium for integration of your online booking form and Google Calendar.
3. Testing the Trigger
Time to test your trigger. By this, it means that Zapier will test whether your webhook is catching and relaying information from your booking form or not.
But, we have not yet given any information on our booking form. So, get someone to fill up the form on your website, or do it yourself. Once there is a submission to your form, you can hit the Test Trigger button on Zapier.
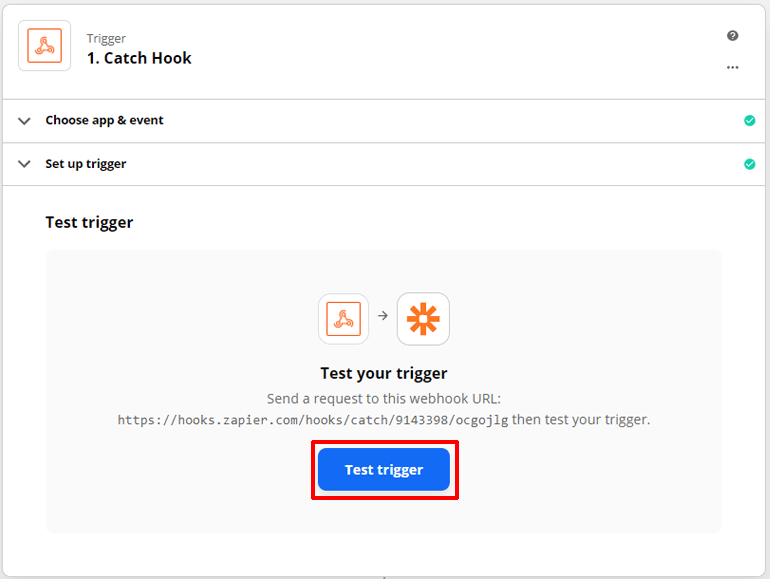
Remember: The form needs to be filled after you paste your webhook URL for Zapier to catch it.
Once you hit the Test Trigger button, you’ll see Zapier saying, We found a request!. You’ll also see the form of information. Your trigger is not set up and tested. Hit the Continue button.
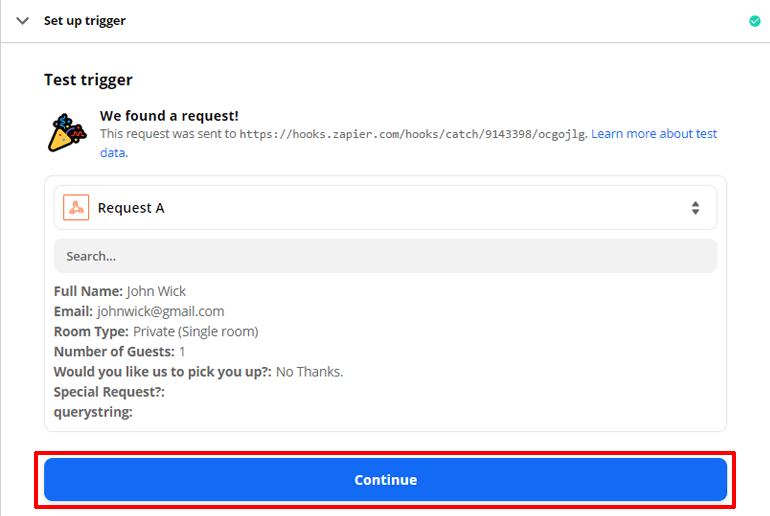
Your trigger has been set and tested. Time for some action.
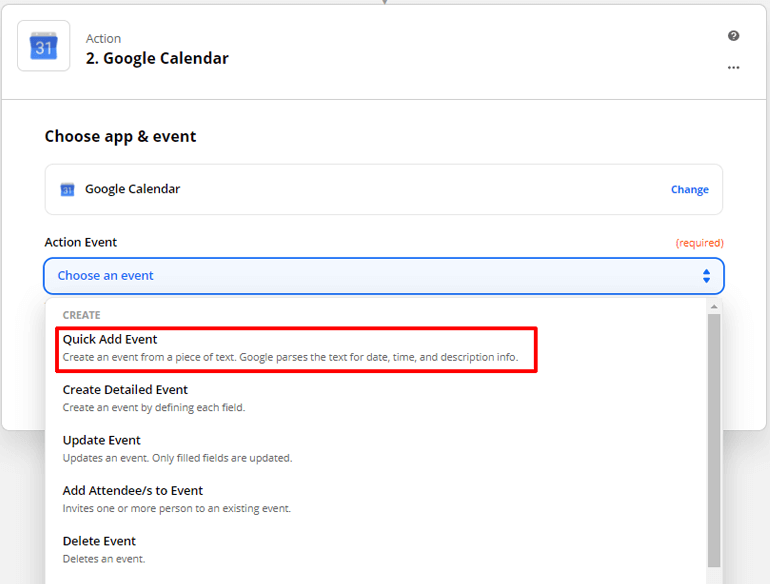
4. Setting up the Action
To start setting up the action, choose an app. This time choose Google Calendar. Under the action event, you can choose different options like quick add event, create a detailed event, update event, etc. To keep things simple, let’s go with Quick Add Event and hit Continue.
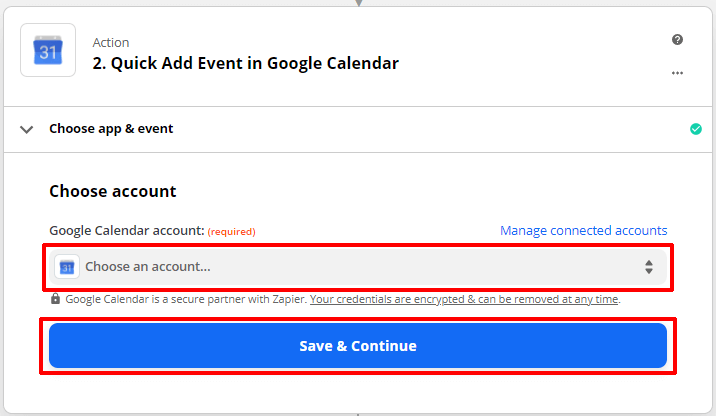
Choose an account of Google Calendar in which you want your event to be added. And hit Save and Continue.
Time to set up the action. Choose a Calendar and describe the event. You can choose the value of a booking form field like the name of the visitor to describe the event. Finally, hit save and continue to start testing your action.

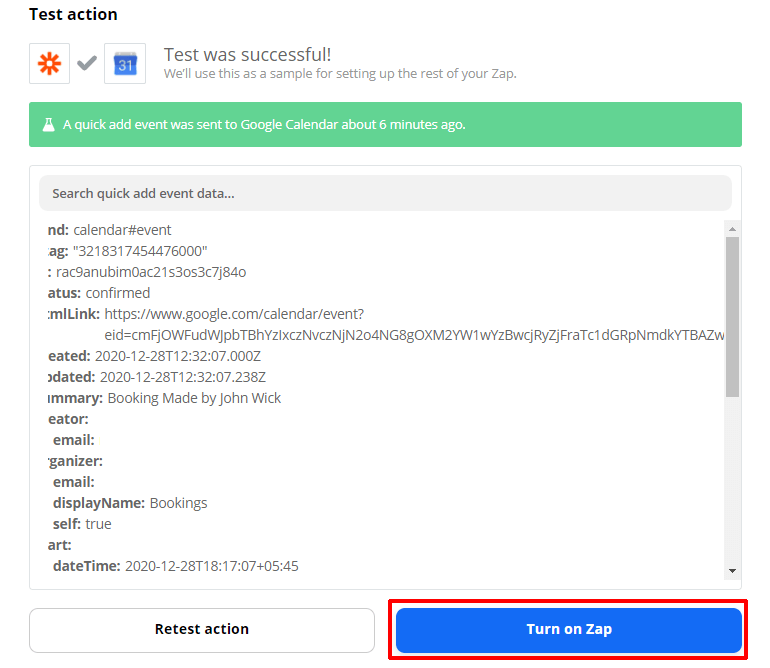
Click on the Test & Continue button to test your action.
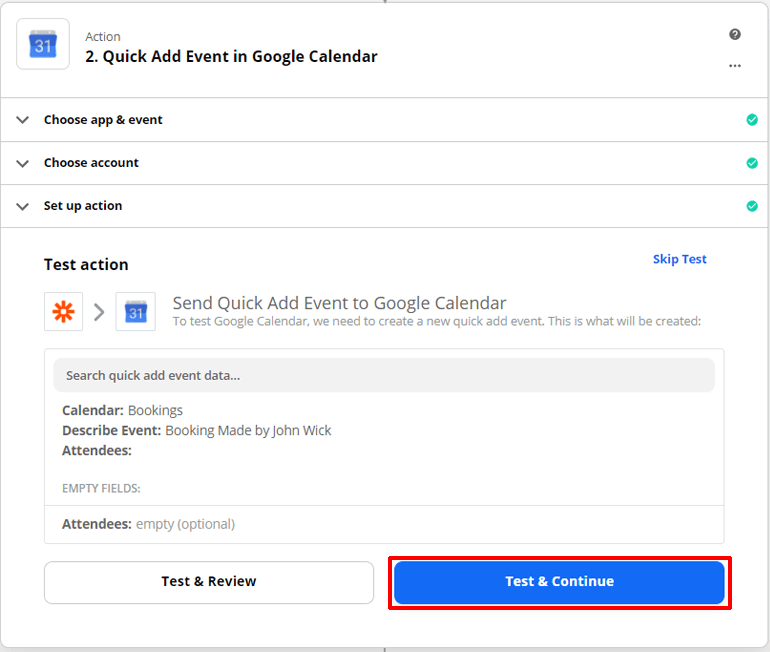
When you click on it, Zapier will add an event to your Google Calendar. Go ahead and check that out. The details of the event will be shown in Zapier.
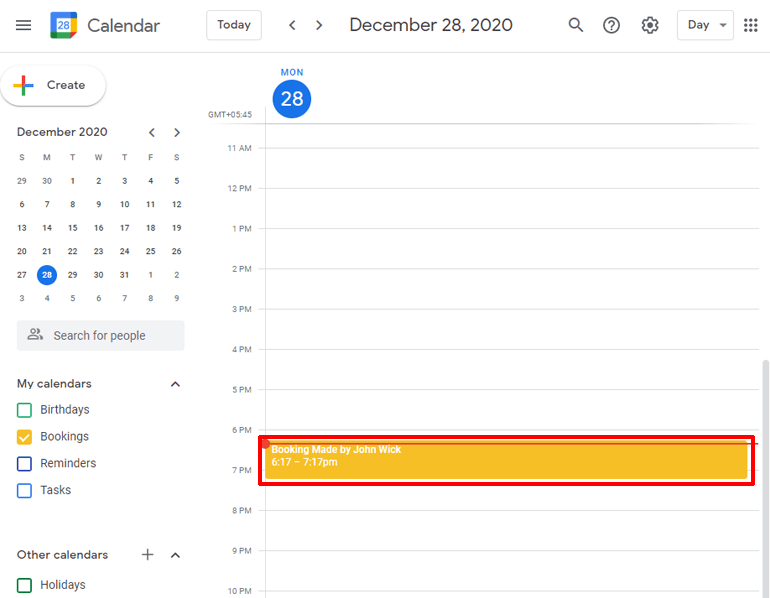
Finally, hit the Turn on Zap button to finish setting the zap.
Congratulations! The WordPress online booking form of your hotel is now integrated with Google Calendar. Every time someone submits a form, Zapier will add a new event in your Google Calendar. You can now review all the submissions right from your calendar.
Wrapping it Up
The WordPress online booking form of your hotel can be created using a form builder plugin like Everest Forms. Everest Forms is a powerful form builder that lets you create any kind of form. You can integrate your form with tons of online applications with add-ons available in Everest forms.
Integrating your online booking form with Google Calendar is done with the Zapier add-on. Zapier will provide a webhook that will catch the information from your booking form and send it to Google Calendar.
You know a little more than you did before. If you agree, then consider sharing this article. Let it go round the world.
Also, if you wanna create other kinds of forms, then check out our other articles. How about an article on How to Create a Job Application form in WordPress.


![Zakra 3.0 | Zakra Pro 2.0 Release [Major Updates!]](https://i.ytimg.com/vi/g3rifl7kWvg/maxresdefault.jpg)