
Are you trying to figure out how to convert WordPress form submissions to PDF?
As a website owner, you may need to convert WordPress form submissions to PDF for several reasons. You may need to share the PDF file with your users or export it for safe keeping and reporting.
By default, WordPress doesn’t have a built-in feature for exporting form submissions in PDF format.
To accomplish this, you’ll require a WordPress PDF generator plugin.
So, in this article, we’ll discuss the best form to PDF WordPress generator plugin. You’ll also learn the exact steps to generate a PDF form from a web form using the said tool.
Let’s begin!
Why Do You Need to Convert WordPress Form Submissions to PDF?
Before we jump into the best WordPress PDF generator plugin. Let’s discuss why convert WordPress form submissions to PDF in the first place.

Here are the major reasons to convert the WordPress form submissions to PDF:
- It’s the most commonly used and secured file format (read-only files).
- PDF files are easy to create and read by everyone and don’t consume much space on your hard drive.
- It preserves all data in original file formats meaning it displays the file the same though viewed from different devices.
- PDFs are the most versatile file formats for printing, archiving, and sharing with your users.
Now that you know why is it essential to generate PDF forms from web forms, let’s dive into the best way to convert WordPress form submissions to PDF.
Best Way to Convert WordPress Form Submissions to PDF
The WordPress repository offers a fantastic collection of WordPress PDF generator plugins.
Everest Forms, Ninja Forms, Gravity PDF, and E2Pdf are some of the popular form to PDF WordPress plugins to name a few.
Amongst them, Everest Forms is the best choice for the form to PDF WordPress plugin. Asking why?
First and foremost, this popular drag-and-drop form builder lets you quickly build custom forms for any WordPress site. Contact forms, survey forms, job application forms, leave request forms, online booking forms; you name it!
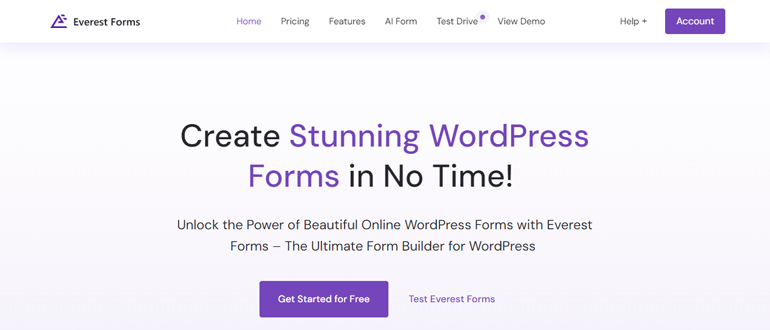
If you don’t want to start building from scratch, Everest Forms gives you various pre-built form templates. You can simply customize them to your taste and publish them on your site.
The premium version of the Everest Forms plugin helps you convert form submissions to PDF without any hassle.
What’s more? You can choose from the multiple PDF templates, customize the PDF templates, generate multi-column PDFs, and even attach PDFs to email.
That’s why we recommend using Everest Forms if you are looking for the best form-generating PDF WordPress plugin.
With that said, let’s go through the step-by-step process of using this plugin to generate PDF files from form submissions.
How to Convert WordPress Form Submissions to PDFs?
Below, we’ll show you the step-by-step process of converting WordPress form submissions to PDF.
Follow the steps, and you should be able to retrieve your form submissions in a PDF file without any hassle.
Step 1: Install and Activate Everest Forms and Everest Forms Pro
To convert WordPress form submissions to PDF, you must first install and activate the Everest Forms plugin.
Since this feature is only available in the premium PDF Form Submission add-on, you’ll need to install both free and pro versions of the plugin.
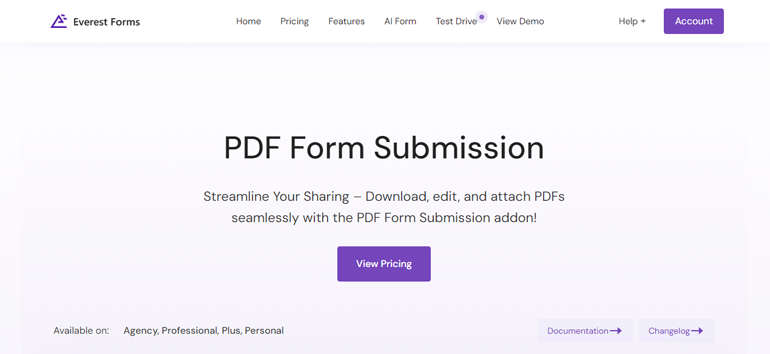
The premium version sits on top of the core free plugin and lets you extend its features with premium add-ons.
Refer to our documentation on properly installing Everest Forms Pro and setting up the free and premium versions. Once you’ve done that, proceed to the next step.
Step 2: Install and Activate the PDF Submissions Add-on
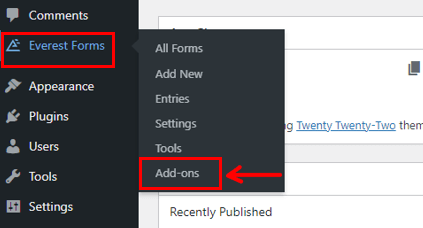
Now, navigate to Everest Forms >> Add-ons in your WordPress dashboard.
Find the PDF Submissions add-on and click the Install Addon button.
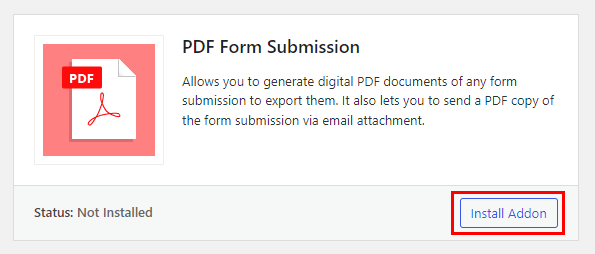
Finish the installation process by pressing Activate.
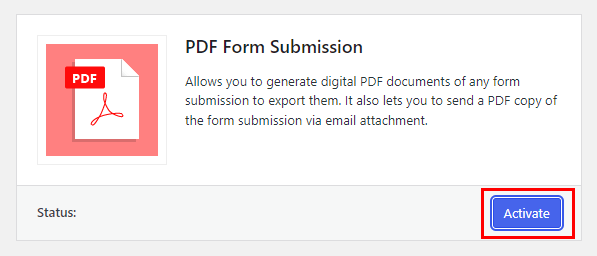
With that, you’ve successfully set up Everest Forms and its PDF Submissions add-on on your WordPress website.
Step 3: Create a New WordPress Form
Naturally, you’ll need a WordPress form if you want to convert it into a PDF file. And you can easily create any form you need with Everest Forms.
Go to Everest Forms >> Add New, where you can choose a pre-built template for your form.
Everest Forms offers templates for contact forms, medical appointment forms, leave request forms, etc. The best part is you can customize these form templates as per your requirements.
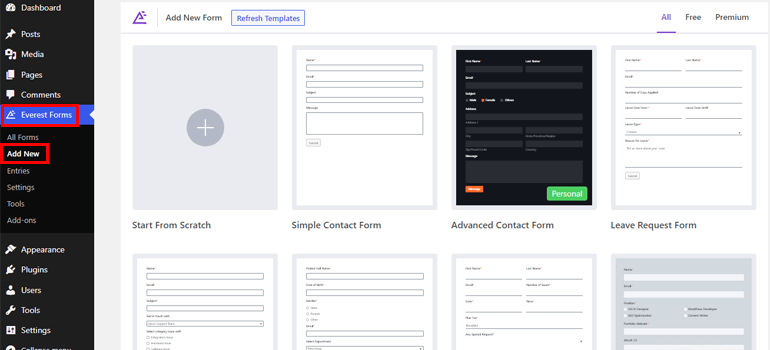
Contrarily, you can build your form from the ground with the Start from Scratch option.
Regardless of which method you choose, give your form a name and hit Continue.
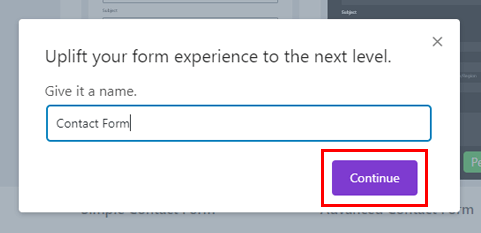
This will take you to the Everest Forms form builder.
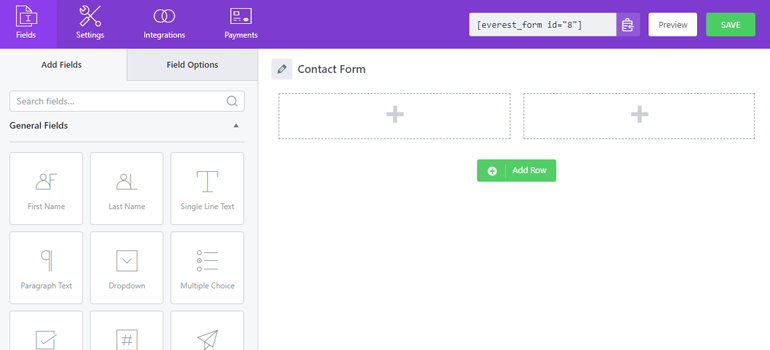
For this guide, let’s build a simple contact form. You can drag and drop any form fields you need into the form and customize them.
Check out our article on creating a WordPress contact form for a detailed tutorial. After the form is ready, proceed to the next step.
Step 4. Enable Conversion of Form Data to PDF Format
Now, here’s the important part. You need to enable the PDF submission feature for the form you created above.
For that, go to Settings >> PDF Submission in the form builder. Here, toggle the switch on for PDF Submission.
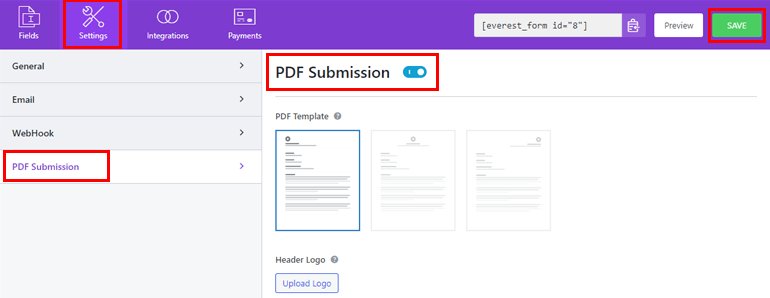
After that, press the Save button at the top. Now, the plugin converts the submissions you receive for this form into PDF files.
Step 5. Customize PDF Submission Settings
The page displays all the available customization settings as soon as you toggle on the PDF submission feature. So, let’s look at each option in detail now.
PDF Template: Everest Forms lets you choose among the three pre-built PDF templates: the Left Header, the Center Header, and the Right Header.
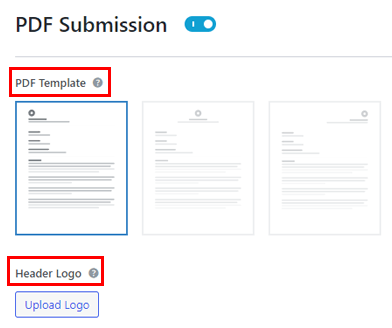
Header Logo: If you have a brand/company logo, you can upload and display it as a logo in the header.
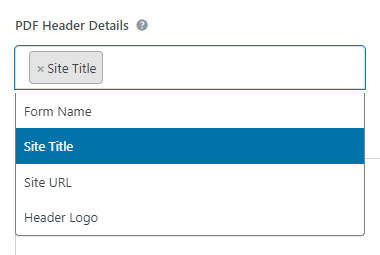
PDF Header Details: You can select the details you want to include in the PDF header from the dropdown. The details include the Form Name, Site Title, Site URL, Header Logo, etc.
Custom Header Text: Type your custom header text that’ll appear in the PDF template.
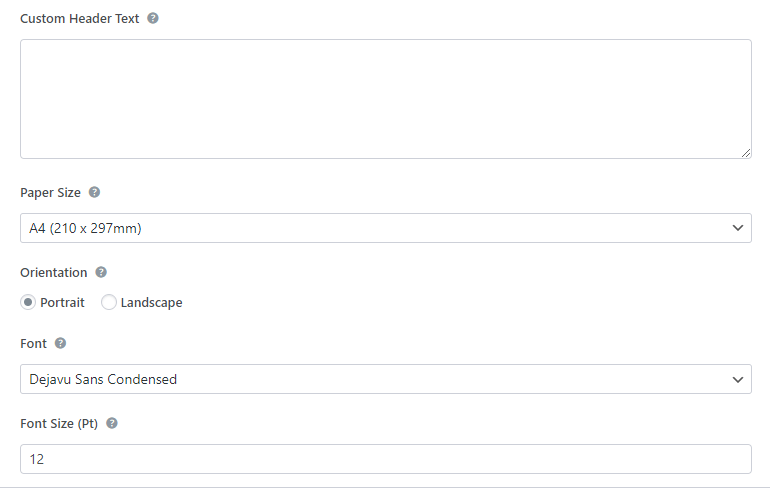
Paper Size: Select the appropriate paper dimensions for your PDF. You have 5 options to choose from in the dropdown.
Orientation: The orientation for the PDF can be Portrait or Landscape.
Font: You can select the suitable font family from the dropdown list.
Font Size (Pt): This option enables you to set the default font size for the PDF text.
Font Color: You can change the default font color for your PDF text from here.
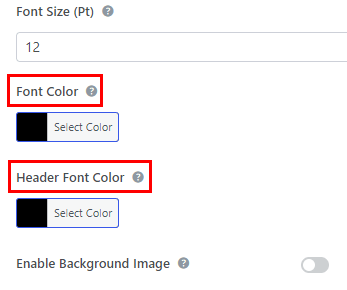
Header Font Color: This option lets you choose the default font color for the PDF header.
Enable Background Image: It lets you add an image to the background of the PDF template. You can enable the option and upload the image. You can even change the image opacity from the Background Image Opacity option.

Background Color: In case you don’t want to enable the background image, you can change the background color of the PDF.

Header Background Color: The option lets you choose a different background color for the header.
Enable Multi-Column PDF: You can enable the multi-column PDF feature to display the form entries in two columns.
Include Field Description: If you’ve added field descriptions to the form fields, enable this option to display them in the PDF.
Download PDF After Form Submit: Enabling this option means the form submission will be automatically downloaded for the users when they hit the submit button. You also get to edit the Custom PDF Download Text displayed in the front end to your users.
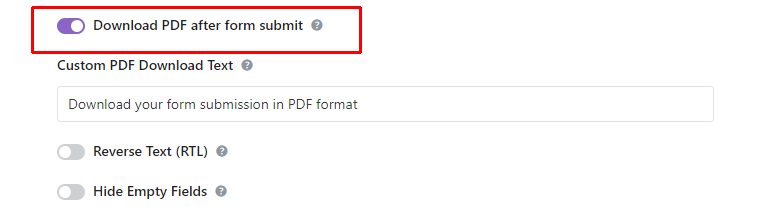
Reverse Text (RTL): You can enable Right To Left (RTL) text for the PDF if you use any RTL language.
Hide Empty Fields: When you toggle this option on, the PDF doesn’t display the form fields that the users left empty.
Enable Choose Fields: With the Enable Choose Fields option, you may select the fields you want to display in the PDF file. This way, you can leave out unnecessary form fields.

In this way, you can customize any settings you need and hit the Save button.
Step 6. Publish Your WordPress Form
Once you complete your form configuration, you can make your form live. For this, copy your form’s shortcode first.
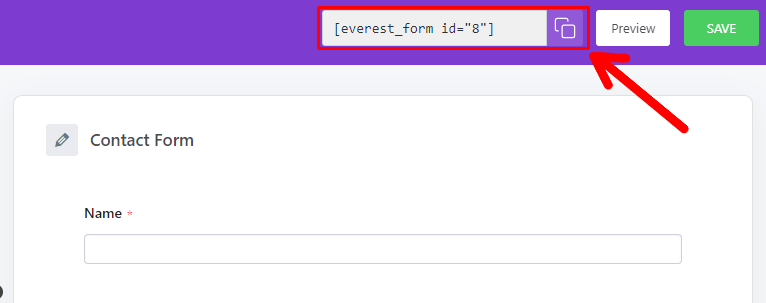
After that, go to the Pages or Posts, where you wish to attach your form and click Add New.
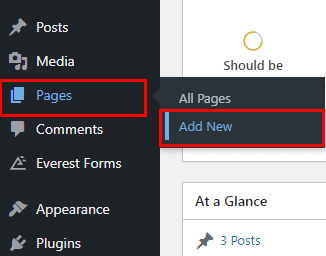
Here, add a suitable title and paste the form’s shortcode that you copied before.
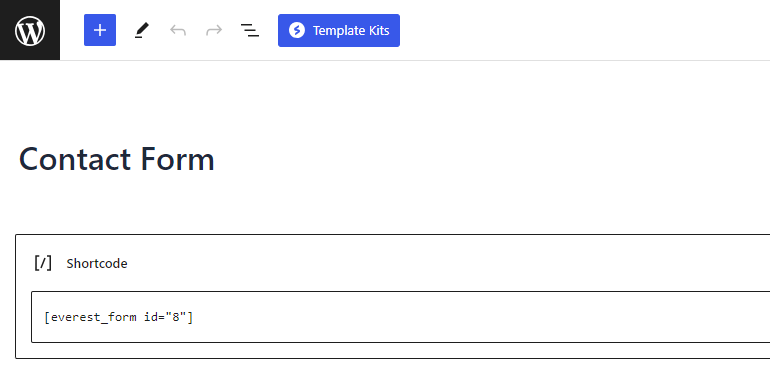
Now, you can Preview the form by clicking on the computer-like icon to check how it looks from the front end and Publish it if you are satisfied.

Step 7. Export WordPress Form Submission to PDF File
Once you make your form live on your site, you’ll get several form submissions.
Now, what if you need to export the form submissions as a PDF file? It’s pretty simple with Everest Forms.
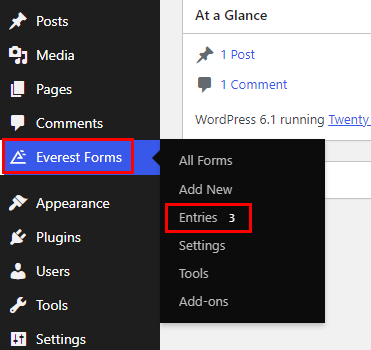
Navigate to Everest Forms >> Entries.
In the dropdown, choose the form you want to export form submissions for. The page will then display complete analytics about the form’s submissions.
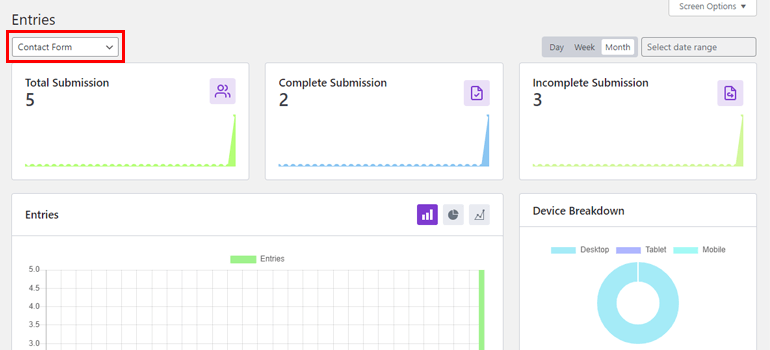
Most importantly, you can export the form submissions as a PDF file.
For this, scroll to the bottom of the page, where the form entries are listed in a tabular form.
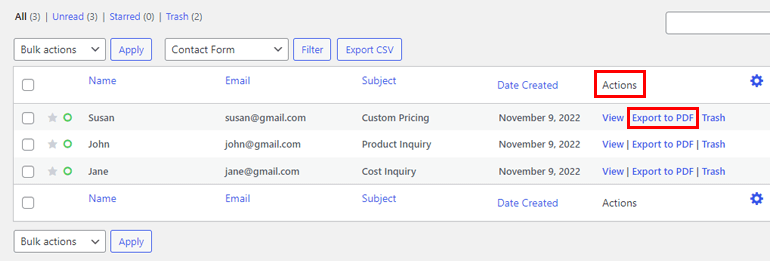
Under the Actions column, you have an option called Export to PDF. All you have to do is click on it, and the entry will be downloaded on your device as a PDF file.

So, this is how you convert WordPress form submissions to PDF using the versatile PDF generator WordPress plugin; Everest Forms.
Wrapping Up!
When it comes to effortlessly converting WordPress form submissions into PDF format, Everest Forms stands out as the ideal choice for the PDF generator WordPress plugin.
All thanks to the PDF Submission add-on it offers to premium users.
With this add-on, you can easily create PDF files for your form submissions and export them as needed. Furthermore, it allows you to personalize the PDF template to suit your preferences.
But that’s not all you can do with Everest Forms. This feature-rich plugin lets you enable conditional redirection, customize form styles, prevent contact form spam, upload files from WordPress forms to Dropbox, and more.
Read more about Everest Forms on our blog. We also have a YouTube channel with fascinating video tutorials for you.
Also, follow us on Twitter and Facebook for updates on more valuable articles.






![Zakra 3.0 | Zakra Pro 2.0 Release [Major Updates!]](https://i.ytimg.com/vi/g3rifl7kWvg/maxresdefault.jpg)